Welcome to the Dr. Cares – Pet Rescue 911 Official Walkthrough. Amy is a dedicated veterinary student who’s just graduated. With her whole life ahead of her, Amy’s sure of one thing: she wants to help animals! This is the game’s official walkthrough and contains in-depth strategies, tips and tricks for all levels and challenges. You’ll also find guides for locating hidden mice, unlocking trophies, and more! Select one of the topics from the Contents list below to get started.
Contents
General Tips & Tricks
New to the world of time management? How about being a vet? Either way, this section is dedicated to getting you started. Get to know how to play the game, and learn a few extra tips and tricks along the way.
How to Play
After starting Dr. Cares – Pet Rescue 911, click “Play” to get started! You will be taken to a level select map. Here, you can click and hold to navigate between chapter screens, or you can navigate by clicking on the arrows in the lower left and right corners.
Dr. Cares – Pet Rescue 911 is a time management game. The goal of the game is to help all the animals in a level before the day ends. The happier the owner, doctor, or customer, the higher your score will be!
To help an animal and/or serve a customer, click on the product(s) the animal or customer ask for. The items you click will be placed on your tray in the lower left corner of your screen. Take the products to the animals or customers in a timely manner, then check the customers out at the register. At this point, you’ll receive an overall score. If an animal was on an exam table, a “!” bubble will appear, meaning the table now needs to be cleaned. Click on the table to clean it so that a new animal can come in and be evaluated.
Scoring and Customer Happiness
A happy pet or customer means a high score! Customers almost always enter a location happy. The happiness scale of a customer is as follows:
- Ecstatic – A customer will have a heart next to them. These customers give you the highest scores.
- Happy – A customer that’s smiling, but doesn’t have a heart. These customers give high scores.
- Neutral – A straight-faced customer. They will pay you, but won’t tip any extra.
- Angry – A frowning customer. They give lower scores.
- Outraged – A red-faced customer with a thunder cloud next to them. These customers are extremely unhappy, and will leave the location very quickly if you don’t help them.
Earn additional score bonuses by achieving combos, upgrading the location, keeping the clinic clean, and finding the level’s hidden mouse. Try to get 3 stars on the story levels, and 1 star for challenges!
Mice Locations
In each of the game’s main story levels (Levels 1 – 60), a secret mouse is hidden. Listen for the tell-tale squeaks, and keep an eye out for a little grey mouse. If you find a mouse and click on it, not only will it increase your score, but it will also count toward a special trophy you can unlock. Mice are not hidden in challenge levels, and any mice that do appear in challenge levels do not count toward unlocking the trophy. To view a complete list of all mice in the game and their hiding places, visit the Mouse Locations section of our walkthrough. You can also click “Mouse Location” under each level in the walkthrough below to be taken straight to an image showing where the mouse is hiding.
Upgrades
Every time you complete a level, you will earn coins. You can use these coins to purchase upgrades for the location you’re working in. Upgrades can help Amy’s performance, increase customer patience or satisfaction, and even increase tips! View the upgrades available in a location after selecting a level to preview what upgrades are available and what bonuses they offer. Once an upgrade has been unlocked, it will be permanently unlocked for all levels of that chapter.
Additional Tips and Tricks
- Bright as a Diamond! Complete each level’s challenge to earn diamonds. Diamonds can be used to purchase gifts for Newton. View the number of diamonds you’ve earned and what you can purchase with them by clicking the “Diamonds” button in the upper right corner of the level select map. The presence of a diamond icon in front of each level on the map will indicate whether or not the diamond has been earned for that location.
- Task Manager Extraordinaire! Stacking tasks is a great way to keep up with the flow of a busy clinic. Don’t be afraid to click on multiple products back-to-back when the orders start flowing in. It’s a great way to keep moving quickly and serving customers without being overwhelmed.
- Stock the Shelves! The start of the day is the perfect time to restock any products that may need it. Products that have a number next to them are available in limited stock. Keep products stocked and try not to fall behind.
- Squeaky Clean! A clean clinic is a happy clinic. A clinic with no dirty tables at the end of the day will always add +100 bonus points to your score, regardless of the level you’re playing.
- Checkout, Checkpoint! You don’t have to wait at any one place in the clinic. The checkout monitor is almost always located in the center of a clinic. Click on the monitor even when customers aren’t around to move Amy to this location, making the rest of the clinic more quickly accessible.
- Two of a Kind! When serving customers with pets on the table, it doesn’t matter whether you click on the customer or the pet. As long as you click on either one, the pair will receive the item they ask for.
- The More, the Merrier! Helping multiple animals in a single trip and checking out multiple customers at once can result in big bonuses. Use these to increase your score.
- Full-time Full Orders! Whenever you can, try serving a customer’s complete order to them in a single trip. This will help you keep on top of tasks.
- A Clean Clinic is a Happy Clinic! A “!” bubble will appear over an exam table or stall when it’s in need of cleaning. Click on the area to have a cleaner take care of it. If a table isn’t clean, a new animal can’t be examined until it is.
- Endless Entertainment! Keep the animals entertained by using an entertainer. Entertainers vary per location – sometimes it’s Jack, sometimes it’s Newton, and sometimes there’s no entertainer at all. However, using an entertainer can cheer up a pet, improving the mood of their owner. This even works if their owner is waiting in line!
- One-Two! There are several minigames that require you to click on a button and land a ball or needle in a specific green range. Quickly clicking the button twice as soon as the minigame opens is a useful trick to acing the minigame quickly. See the Minigames section below for more information on which minigames this works with.
Dr. Cares – Pet Rescue 911 Walkthrough
Welcome to the official Dr. Cares – Pet Rescue 911 Walkthrough! This is the complete official guide, covering all levels, challenges, mice, trophies, and more! Click on one of the Contents above to get started, or keep scrolling to dive right in. If you require video help, refer to the Video Walkthrough section at the bottom of the guide.
Chapter 1 – Arthur’s Clinic
Fresh out of school with all her exams aced, Amy is now officially a veterinarian. Grandpa Arthur, owner of the Snuggford vet clinic, couldn’t be prouder. Helping animals runs in the family.
Level 1: Homecoming
Challenge: Make sure every customer is happy.
Mouse Location: To the left of the main counter, below the leftmost grooming table.
It’s your first day in the vet clinic! Today’s goal is to keep customers happy. There are two ways to tell if a customer is happy: 1) Look for the heart icon to the right of their face. If a heart is visible, a customer is very happy! 2) Look for the customer’s smile. A smiling customer is a happy customer. Check out every customer with a smiling face today and you’ll earn yourself a diamond.
Level 2: Future Plans
Challenge: Take care of Daisy.
Mouse Location: On the left side of the bottommost counter.
Paige’s bunny, Daisy, is sitting on top of the leftmost examination table. Whenever Daisy needs something, a bubble will appear showing the icon of the item Daisy needs. Grab the item and use it on Daisy before the green color drains from the bubble to care for her. Do this successfully 5 times before the end of the day to earn a diamond.
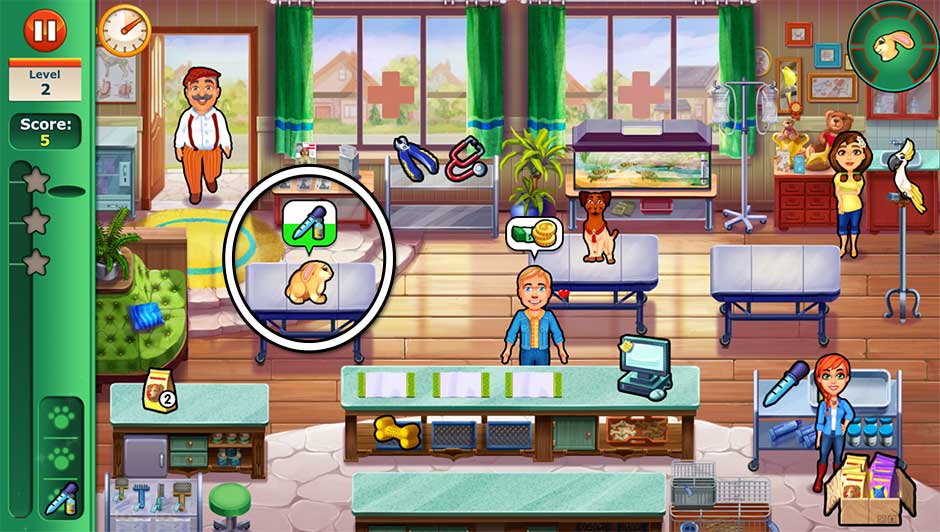
Dr. Cares – Pet Rescue 911 – Level 2
Level 3: Confessions
Challenge: Send job applications.
Mouse Location: On the right, behind the tray with the vaccine vials.
Amy’s laptop is sitting on the counter at the bottom of the screen. A “!” bubble will appear over it at the start of the day. Click on the laptop to have Amy send out applications. A meter will appear, showing how far along she is in her task. If you need to help a customer during this time, don’t worry! The bar will remain, and all you need to do is click on the laptop again to have Amy resume the task. You will need to fill the bar up a total of 3 times by clinic closing to finish sending out all the applications.
Tip! Click on the laptop whenever you aren’t helping customers – even if it’s only for a second – to make the best use of your time.
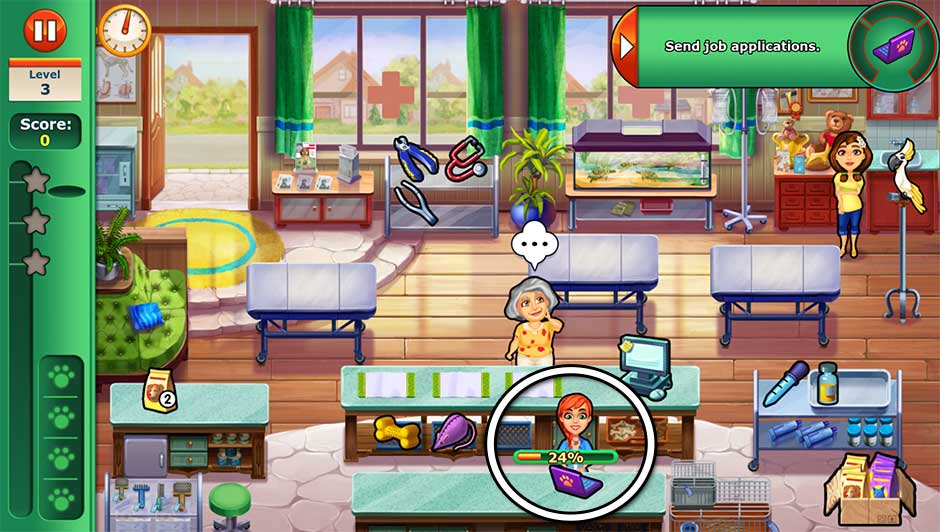
Dr. Cares – Pet Rescue 911 – Level 3
Level 4: Great Escape
Challenge: Find the missing turtles!
Mouse Location: Behind the counter to the left of the checkout monitor.
Arthur’s crafty turtles have gone missing! You will need to find all 5 before the end of the day. Throughout the day, the turtles will pop out of various locations. When they appear, click on them before they disappear again! The turtles’ locations are shown below:
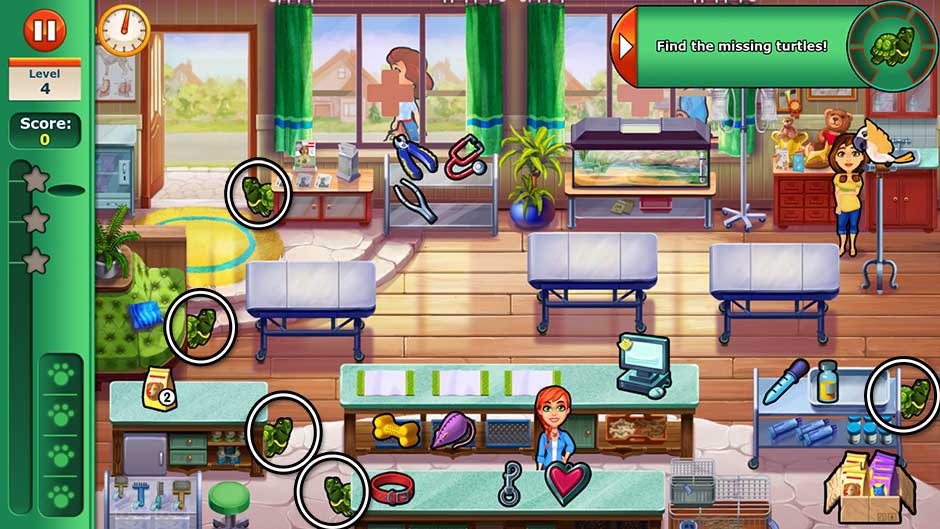
Dr. Cares – Pet Rescue 911 – Level 4
Level 5: Interview Day
Challenge: Poor Scrappy is ill. Diagnose him!
Mouse Location: Behind the divider of the waiting couch on the upper left, in front of the door.
Scrappy’s sick today. Throughout the day, bubbles will appear over Scrappy showing an item that he needs for diagnosis. Bring the item he needs to him before the green color drains from the bubble. Do this successfully a total of 5 times before the end of the day to earn a diamond.
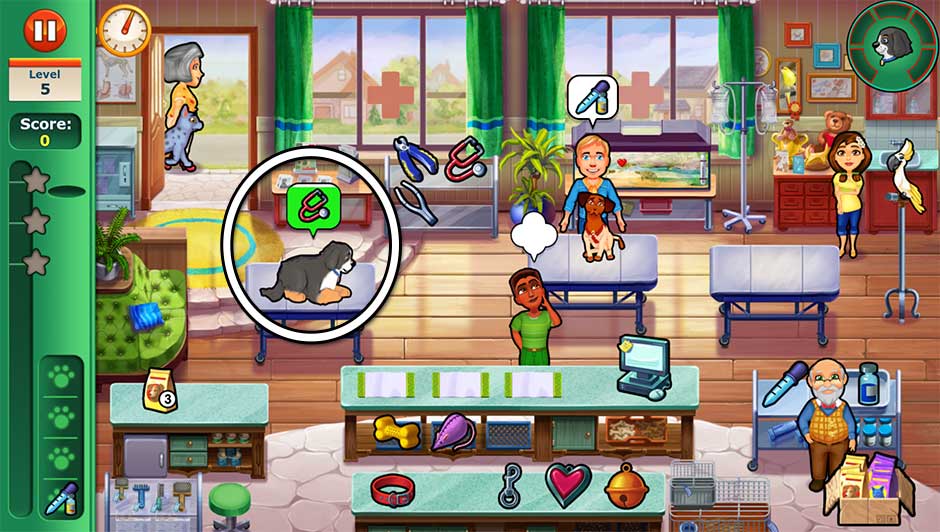
Dr. Cares – Pet Rescue 911 – Level 5
Level 6: Special Delivery
Challenge: Don’t let Newton disturb Arthur!
Mouse Location: Behind the top of the refrigerator unit to the left of the door.
Newton loves attention, but Arthur needs to focus. All throughout the day, Newton will fly in from the right side of the screen, slowly edging closer and closer to Arthur. Whenever Newton appears, click on him right away to have Amy shoo him away. Keep him away from Arthur successfully until the last customer leaves to earn a diamond.
Tip! If you have multiple tasks you need to do and multiple customers you need to help when you notice Newton appear, quickly click on him. As long as Newton is clicked, he will not fly closer, and Amy will successfully shoo him away.
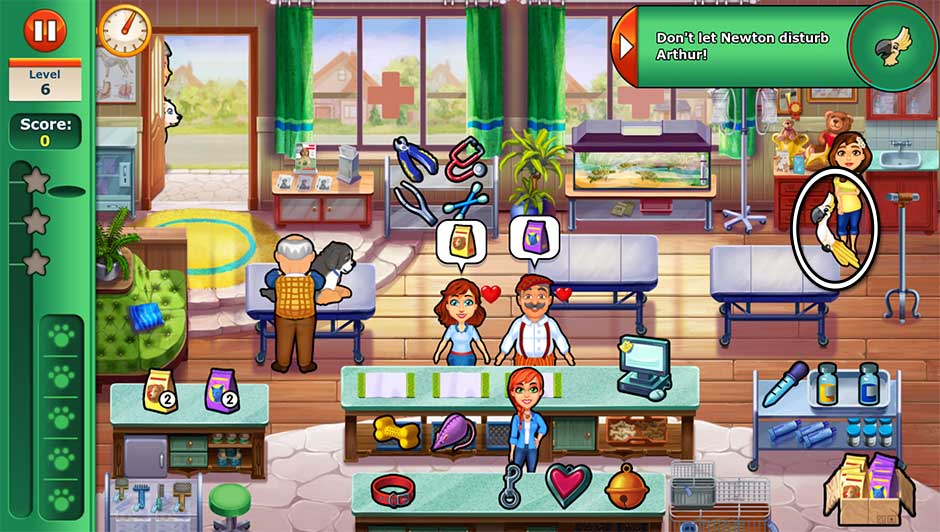
Dr. Cares – Pet Rescue 911 – Level 6
Level 7: All or Nothing
Challenge: Keep checking Scrappy’s I.V.!
Mouse Location: Behind the upper left corner of the cabinet to the right of the door, in front of the curtain.
Scrappy’s I.V. needs checking throughout the day. Scrappy is on the leftmost exam table again. A meter will appear over him, whose percentage will deplete over time. The goal is to keep clicking on Scrappy before the meter gets too low. If the meter empties, you will fail today’s challenge. Every time you check Scrappy’s I.V., the bar will refill, giving you time to help other customers.
Tip! Even if you’re helping other customers, as long as you click on Scrappy, the bar depletion will stop up until Amy actively checks on him again. Use this to your advantage when things get busy!
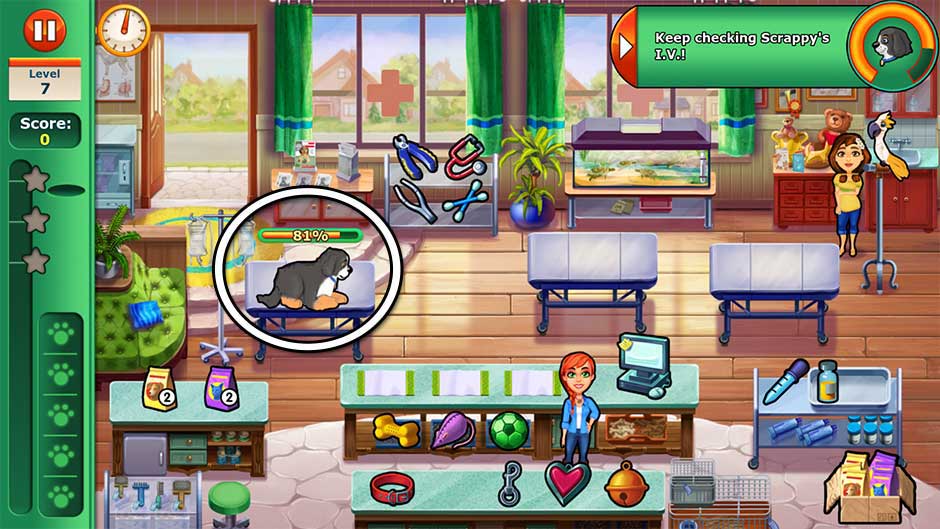
Dr. Cares – Pet Rescue 911 – Level 7
Level 8: Vanishing Dog
Challenge: Clean up the clinic.
Mouse Location: On the left side of the vaccine cart, on the right side of the clinic.
The clinic is a mess! Pick up all 8 items scattered on the floor where they don’t belong. Do this before the end of the day, and you’ll earn another diamond! The 8 item locations are pictured here:
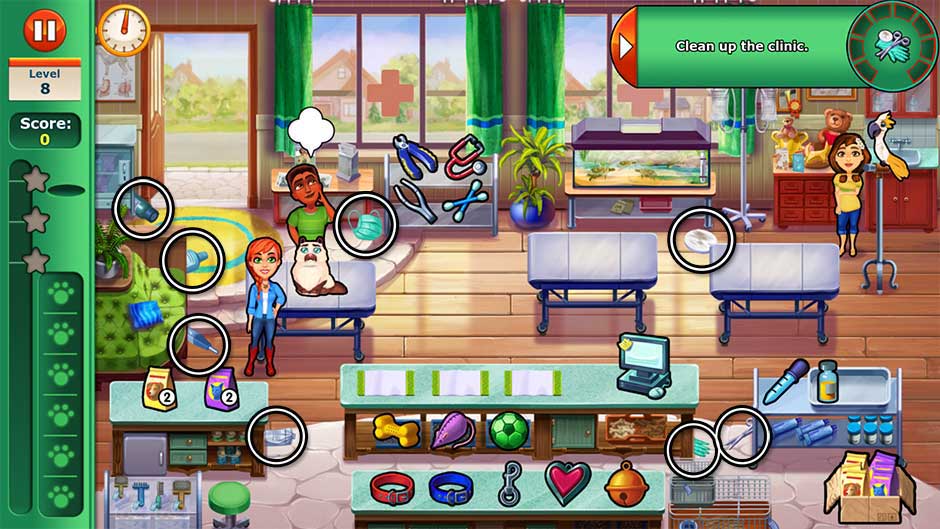
Dr. Cares – Pet Rescue 911 – Level 8
Level 9: Heart-to-Heart
Challenge: Get 20 combos, chains or bonuses!
Mouse Location: Behind the main counter, between the first and second placemats.
Today’s goal is to get 20 combos, chains, or bonuses. There are several ways to do this:
- Quick! – Serve a customer within a few seconds of them ordering to earn this bonus.
- Nice! – Serve a customer their full order in a single trip.
- Smart! – Serve customers their full orders back-to-back without picking up new items.
- Sharp! – Clean 2 or more examination tables back-to-back.
- Checkout bonuses – Checkout multiple customers at the cash register at the same time. Note: You can check out four or more customers for huge bonuses!
- Mouse – Find today’s hidden mouse (see Mouse Location above). Note: This bonus is added at the end of the day.
- Clean clinic – Make sure all examination tables are clean at closing. Note: This bonus is added at the end of the day.
Level 10: Amy’s Choice
Challenge: Pros and cons time! Help Amy make a choice…
Mouse Location: On the left side of the rightmost examination table.
There’s a notepad on the left side of the checkout counter today. When a “!” bubble pops up over the notepad, click on it to have Amy list pros and cons. You will need to do this before the green color disappears from the bubble. Do this 3 times before the end of the day to complete today’s challenge.
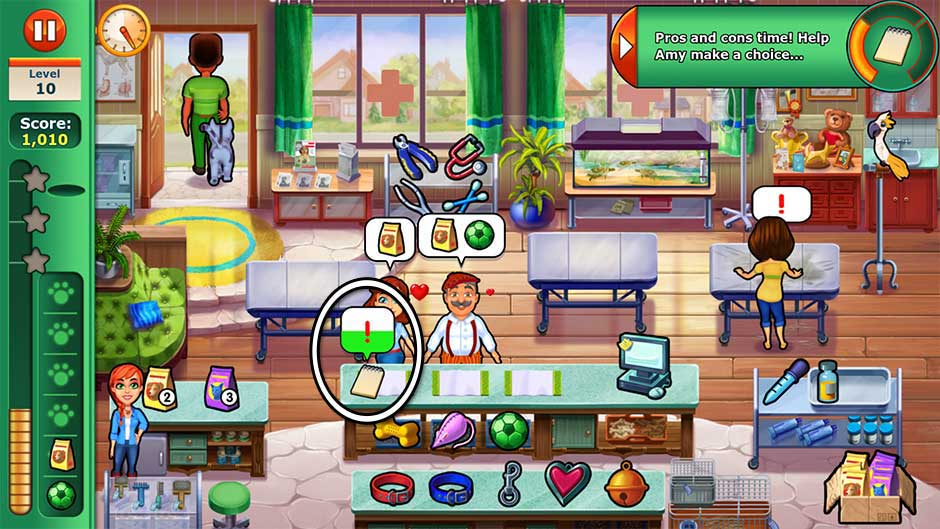
Dr. Cares – Pet Rescue 911 – Level 10
Chapter 2 – Pawsitive Clinic
Everything’s big in the Big Apple, including vet clinics. Amy travels to New York City to start her new career as a veterinarian. But it might be a little more glamorous than she thought.
Level 11: First Day
Challenge: Serve customers within 20 seconds of each other.
Mouse Location: On the left side of the table with the scissors, next to the leftmost grooming station.
Customers will come in throughout the day. Make sure you serve them within 20 seconds of each other. If you take longer than 20 seconds between customers, you’ll fail today’s challenge. A meter in the upper right corner of the screen will help you keep track of how much time has passed between customers. Try not to let the meter deplete by more than half. Successfully serve all customers within 20 second of each other, and you’ll earn a diamond.
Tip! Even if you have a customer’s order on the tray and have clicked on them, it still takes time for Amy to get to them. This time counts toward the 20 second intervals, so don’t wait too long before you bring a customer their order. At the same time, try to pace yourself so you allow about 10 seconds to pass before you serve a customer if no new ones have come in yet.
Level 12: Small Talk
Challenge: Get three quick bonuses in a row.
Mouse Location: To the left of the pet bed in the upper right corner, near the cat tree.
Serve a customer their full order within a few seconds of them ordering to receive a quick bonus. Do this 3 times before the end of the day to earn today’s diamond.
Tip! If you have difficulty serving customers quickly, try picking a popular item, such as perfume, and keep it on your tray. That way when a customer orders, you have it ready to go!
Level 13: Pink Puppy
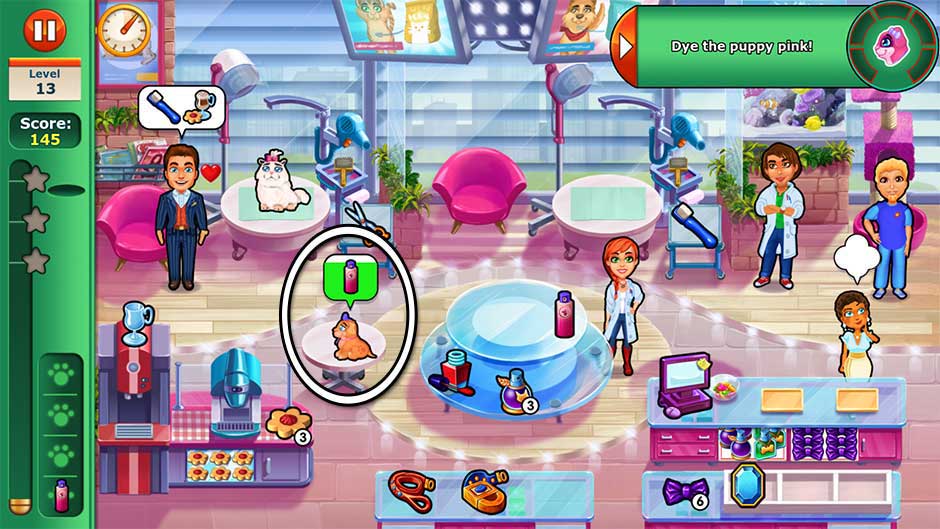
Challenge: Dye the puppy pink!
Mouse Location: Behind the upper right corner of the bottom cabinet, where the leashes are kept.
Throughout the day, a bubble will pop up over the puppy’s head on the left. The puppy always requires the same item: the pink spray. Click on the pink spray bottle and take it to the puppy before the green color drains from the bubble. You will need to do this 5 times before day’s end in order to complete today’s challenge.
Tip! Don’t wait! When the puppy’s bubble pops up, make sure to take the item to them right away, as quickly as possible. As soon as you’ve clicked on the spray, followed by the puppy, even if Amy needs extra time to get there, the color depletion will pause as Amy makes her way over. Use this trick to stop the color draining if things get too busy.
Dr. Cares – Pet Rescue 911 – Level 13
Level 14: Late Again
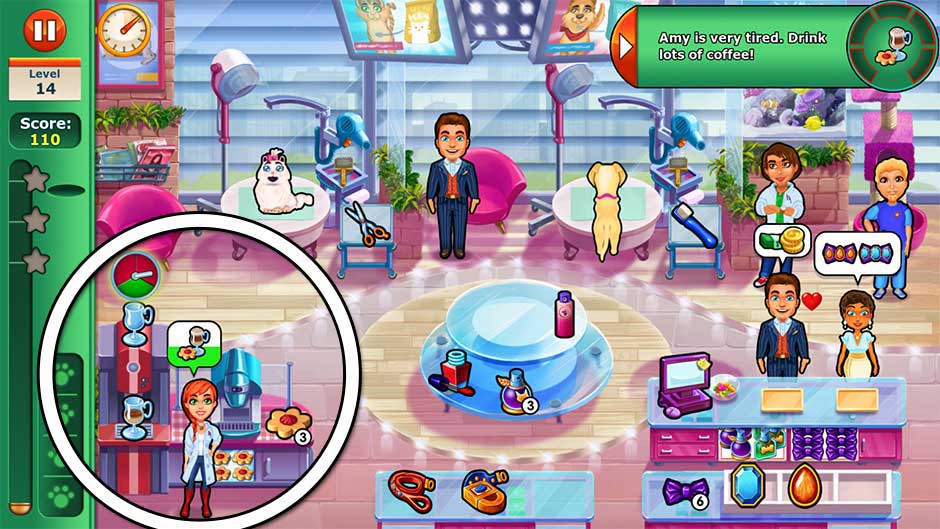
Challenge: Amy is very tired. Drink lots of coffee!
Mouse Location: On the left side of the table with the toothbrush, next to the rightmost grooming station.
Amy’s having trouble staying awake. Over the course of the day, a bubble will occasionally pop up over her head indicating she needs coffee, stat! When this happens, go to the coffee machine on the lower left. Brew a glass of coffee, clicking on it once the needle lands in the green zone. Once you’ve collected the coffee, click on the flower-shaped cookie to top it off. As soon as you do this, Amy will drink the coffee instead of putting it on her tray. Don’t dawdle, though! You will need to do all of this before the green color drains from the item bubble over her head. Do this successfully 5 times before the end of the day and you’ll earn another diamond.
Dr. Cares – Pet Rescue 911 – Level 14
Level 15: Own Place
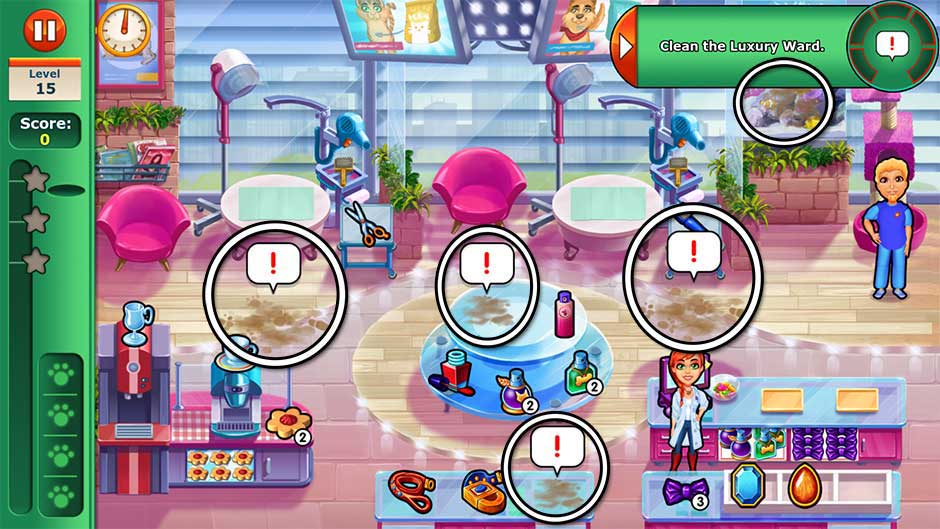
Challenge: Clean the Luxury Ward.
Mouse Location: On the left side of the round center display table.
This place is a mess! Click on each of the messes, indicated by a “!” bubble, in order to have Amy clean them. Once Amy starts cleaning a mess, a meter will appear showing how far along she is. Once the meter is filled 100%, the mess will be clean. Clean all 5 messes before the end of the day to complete today’s challenge.
Tip! Clean every spare chance you get when you’re not serving customers. You should also try to focus on one mess at a time, so you don’t accidentally overlook one. Don’t forget the fish tank also needs cleaning.
Dr. Cares – Pet Rescue 911 – Level 15
Level 16: First Sight
Challenge: Entertain at least eight pets.
Mouse Location: Behind the checkout countertop, to the right of the checkout monitor.
Whenever a customer comes in with their pet, their pet will jump up on the table. Before serving the customer, click on Jack, then click on the pet on the table. Jack will go over to the pet and entertain them while their owner waits for the item they’ve asked for. Have Jack entertain 8 different pets before the end of the day to complete today’s challenge.
Level 17: Transition
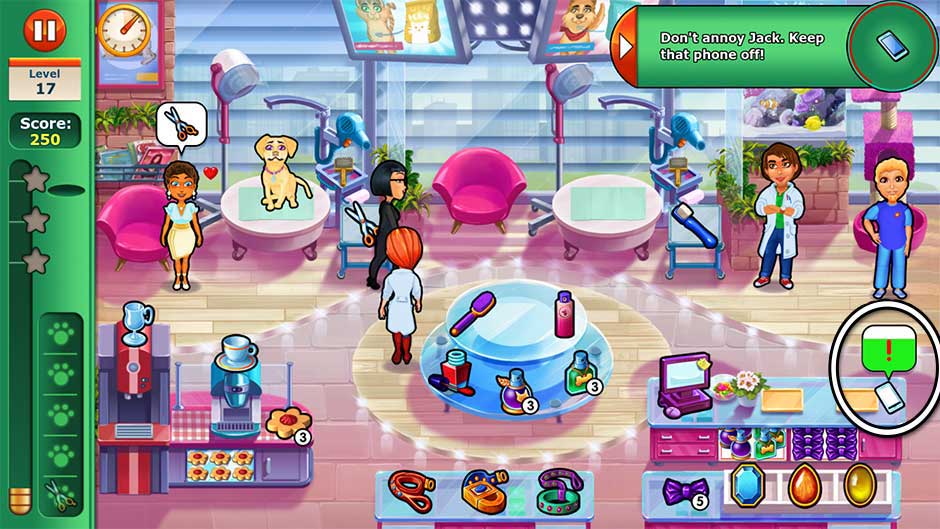
Challenge: Don’t annoy Jack. Keep that phone off!
Mouse Location: Behind the top of the round center display table.
Amy’s phone is sitting on the right side of the checkout counter today. Throughout the day, her phone will go off. When this happens, a “!” bubble will appear over it. Quickly click on the phone to have Amy put it on mute, before the green color drains from the bubble. This will happen numerous times throughout the day, up until the very last customer leaves. Successfully click on the phone before the color drains each time and you’ll earn another diamond at the end of the day.
Dr. Cares – Pet Rescue 911 – Level 17
Level 18: Big Dates!
Challenge: Dye the poor puppy pink! Again!
Mouse Location: At the top of the bottommost display counter where the leashes are kept, toward the left side.
Just like level 13, you’ll need to dye the poor puppy pink again. The puppy is sitting on the table on the left, and will only require the pink spray. When the puppy’s item bubble pops up, quickly pick up the spray, then use it on the puppy before the color drains from the bubble. Repeat this successfully 5 times before day’s end to complete today’s challenge.
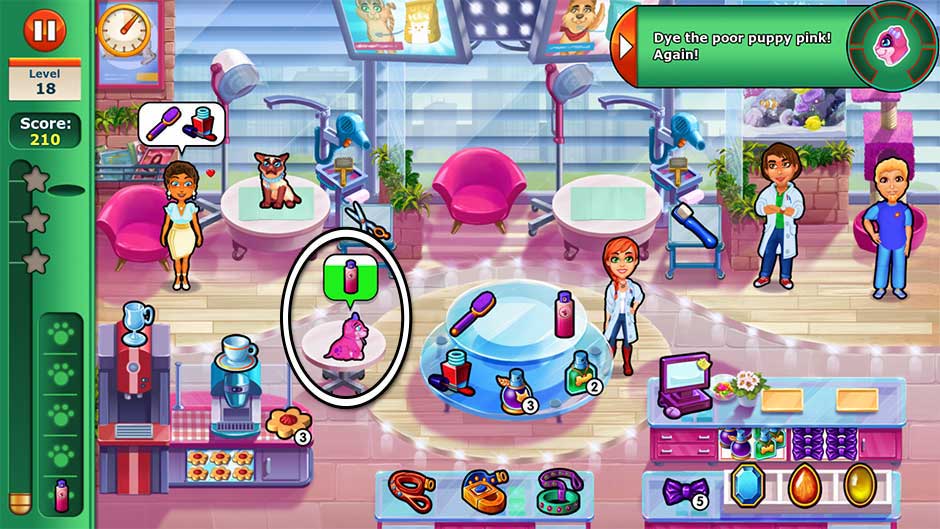
Dr. Cares – Pet Rescue 911 – Level 18
Level 19: Ups and Downs
Challenge: Don’t ever let an item run out of stock!
Mouse Location: On the left side of the drink counter, next to the cookie.
There are 3 types of items that require restocking: cookies, perfumes, and bows.
- Cookies are located on the left, next to the coffee machine. Restock these by clicking on the cookie tray underneath the coffee machine.
- Perfumes sit on the center display table. Restock these by clicking on the perfume assortment located underneath the cash register. Clicking these will restock both varieties of perfume at once.
- Bows sit on the counter in the lower right corner. Restock these by clicking on the bows underneath the cash register, to the right of the perfume stock.
Keep all items stocked, with at least 1 remaining at all times today. If customers’ orders exceed the stock currently available, either restock first, or split them up. If the numbers next to these items reaches 0 at any point, you’ll fail today’s challenge. Have at least 1 remaining, and you’ll earn another diamond when the last customer leaves.
Level 20: The Dinner
Challenge: Prepare a grocery list for dinner with Jasper!
Mouse Location: On the right side of the round center display table, near the cash register.
Today’s goal is straight-forward. A notepad is sitting on the right side of the checkout counter today. A “!” bubble at the start of the day indicates its location. Click on the notepad to have Amy write down a grocery list. As soon as she starts writing, a meter will appear showing how close she is to completing her list. Work on this list by clicking the notepad again whenever you’re not helping a customer. Finish her list, and you’ll be rewarded with a diamond.
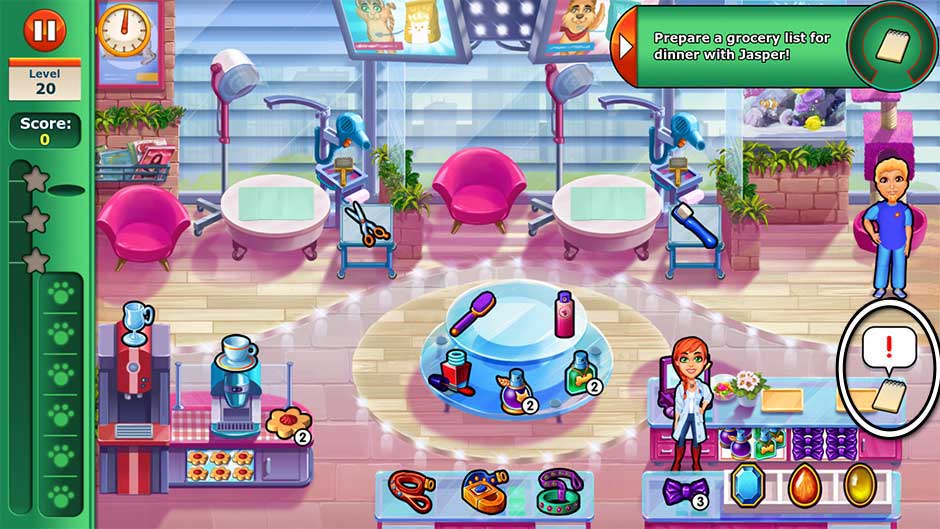
Dr. Cares – Pet Rescue 911 – Level 20
Chapter 3 – Critical Care
Jack may not be happy, but Amy is determined to prove herself and make a difference. Challenges await in the high-traffic critical care portion of the veterinary clinic.
Level 21: Dream Job
Challenge: Get 10 quick bonuses!
Mouse Location: Behind the upper left corner of the medicine cabinet in the upper right corner of the room.
Bring full orders to doctors within a few seconds of their request. Do this 10 times before the end of your shift to complete today’s challenge. Remember to keep your pills in stock by clicking on the supplies in the cabinet on the upper right. If you have difficulty getting items to doctors in time, try keeping a popular item, such as the scissors, on your tray.
Level 22: Right Reasons
Challenge: Clean the ward and unpack the equipment.
Mouse Location: Behind the gurney in the center of the room, below the first aid cabinets on the wall.
The cleaner may clean tables, but he won’t clean up your messes in the ward! There are 2 puddles on the floor and 2 boxes that need unpacking, for a total of 4 items you will need to clear away before the end of the day. Each of these items are marked with a “!” bubble. Click on an item to have Amy start clearing it away. A bar will appear showing how far along she is. Clear the items away every spare moment you have between helping doctors. If you succeed in clearing everything away before the end of your shift, you’ll earn another diamond.
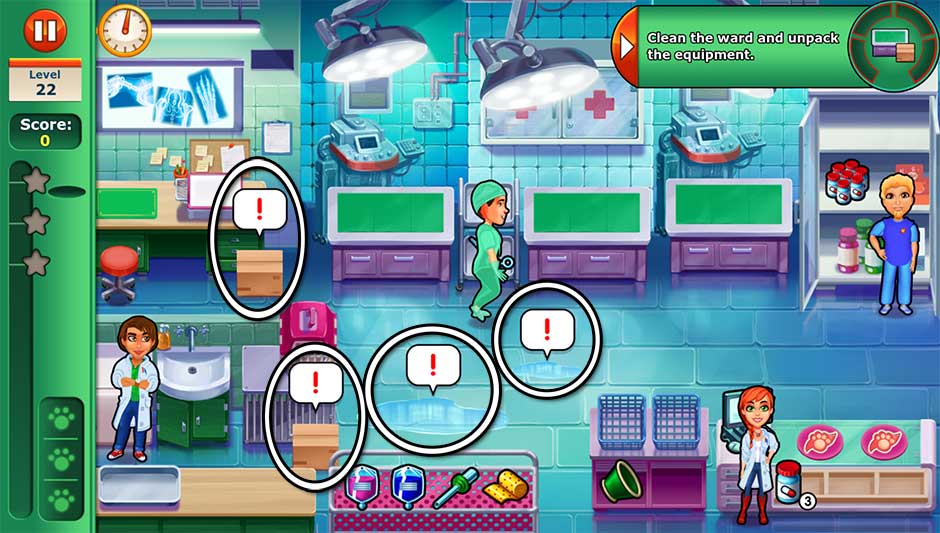
Dr. Cares – Pet Rescue 911 – Level 22
Level 23: Maggie
Challenge: Do a check-up on Maggie.
Mouse Location: On the left side of the leftmost operating table.
Maggie’s in the clinic for her checkup today. She will sit on the center table. When a “!” bubble appears over her head, quickly click on her before the green color drains from it. Do this 5 times before the end of your shift to earn another diamond.
Tip! Maggie sitting on the center table means there’s 1 less table for other incoming pets, leaving you with only 2 to work with. Make sure you keep on top of keeping these clean with the cleaner’s help, otherwise things can back up quickly!
Tip! Even if Amy is currently busy with another task, clicking on Maggie when the “!” bubble is visible will stop the color from draining any further.
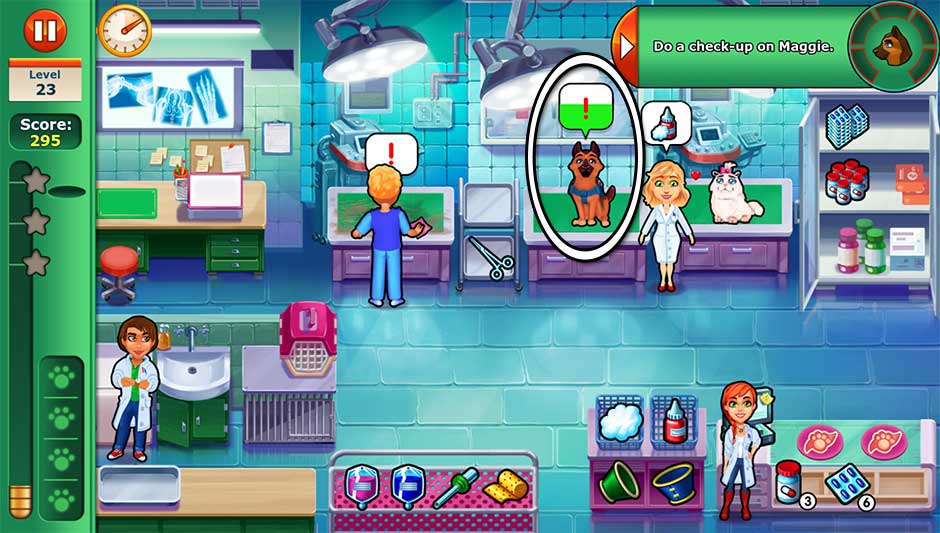
Dr. Cares – Pet Rescue 911 – Level 23
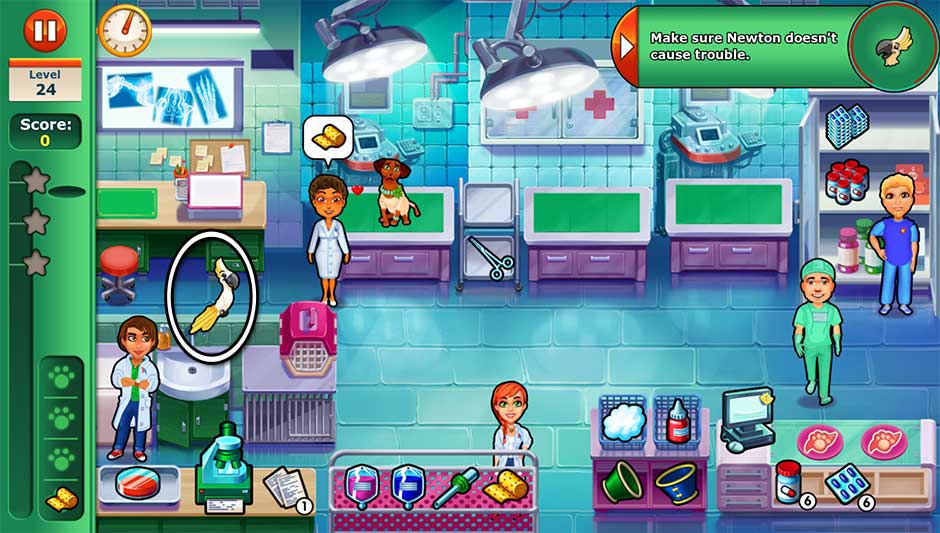
Level 24: Wise Guy
Challenge: Make sure Newton doesn’t cause trouble.
Mouse Location: Behind the wall divider above the sink on the left.
Silly bird Newton loves attention, especially today! Throughout the day, Newton will try to scoot closer and closer to you in a bid to distract you from your work, but don’t let him! Click on Newton whenever he appears to have Amy shoo him away. He will come back every handful of seconds, so be careful not to lose track of him. Newton will enter from the left side of the screen and perch above the sink. If you don’t click on him in time, he will then fly to the cart with the I.V. bags. You need to click on him before he flies again, otherwise he’ll land on your checkout monitor, and you’ll fail today’s challenge. Keep the bird at bay until the end of today to earn another diamond.
Tip! Newton will keep trying to fly closer, even after the day is done. Always try to intercept him when he’s perched above the sink to prevent him from getting too close to the monitor.
Tip! Even if Amy is busy, clicking on Newton will prevent him from flying any further before Amy shoos him away.
Dr. Cares – Pet Rescue 911 – Level 24
Level 25: This BF Thing
Challenge: Make sure the tables are clean at the end of the day.
Mouse Location: Behind the top of the rightmost gurney, next to the medicine cabinet.
Today’s goal is straight-forward, but easy to forget. Make sure all your tables are clean at the end of the day. Click on any tables with a “!” over them to have the cleaner clean them up. Having a clean clinic at the end of the day will reward you with a +100 Clean Clinic bonus, as well as another diamond for your troubles.
Tip! Even if the ward is closed and tables are still dirty, as long as you’ve clicked on any dirty tables before the last doctor leaves, you will complete today’s challenge.
Tip! You can earn the Clean Clinic +100 bonus on any and all levels of the game. Try it out and improve your score!
Level 26: Sure Man
Challenge: Earn the first star in the first half of the day.
Mouse Location: On the top left side of the stand containing the I.V. bags and supplies at the bottom of the ward.
Earn the first star in the first half of the day in order to earn today’s diamond. To do this, combos are key. Try to check out doctors quickly and keep them happy, but check out multiple doctors as much as you can. Here’s a reminder of how combos and score bonuses work:
- Quick! – Serve a doctor within a few seconds of them ordering to earn this bonus.
- Nice! – Serve a doctor their full order in a single trip.
- Smart! – Serve doctors their full orders back-to-back without picking up new items.
- Sharp! – Clean 2 or more examination tables back-to-back.
- Checkout bonuses – Checkout multiple doctors at the checkout monitor at the same time. Note: You can check out four or more doctors for huge bonuses!
Tip! Keep an eye on the clock! If you notice it’s almost at the halfway mark, quickly check out as many doctors as you can as quickly as you can, and don’t worry too much about waiting for checkout bonuses.
Level 27: A Hero to Save
Challenge: Make sure every doctor is kept happy.
Mouse Location: Behind the top of the leftmost operating table, near the scalpel.
Make sure every doctor leaves the ward happy today. A heart icon next to a doctor is an indication they’re a happy doctor. Try to check out all doctors with heart icons, and place emphasis on checking them out with hearts rather than checking out large groups at once. Your reward will be a diamond at the end of the day.
Tip! A heart icon isn’t the only way to tell a doctor is happy. If a doctor doesn’t have a heart icon at the register, don’t panic! As long as they’re still smiling, they will count as a happy doctor.
Tip! Have Jack console the animals on the examination tables to improve their doctor’s mood.
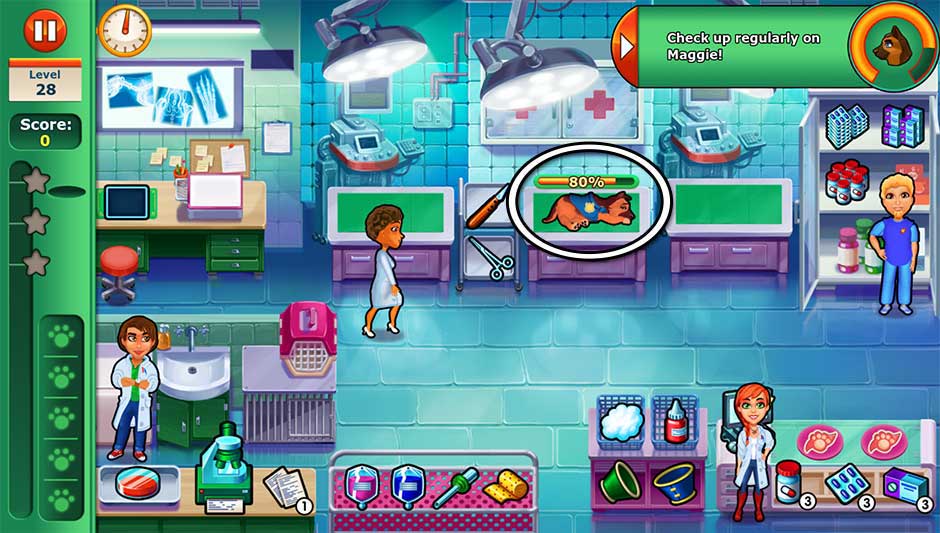
Level 28: Now or Never
Challenge: Check up regularly on Maggie!
Mouse Location: On the floor, at the upper right corner of the I.V. and bandage cart.
Maggie’s not doing too well today, and requires constant checkups. A meter will appear over Maggie which depletes over time. Make sure the bar never reaches 0%! Try to click on Maggie by the time the bar hits 50%. Remember that even if Amy has other tasks to do before getting to Maggie, as long as Maggie has been clicked, the percentage bar will stop draining up until the point Amy checks on her.
Tip! Maggie’s bar will continue to drain even after the final doctor has left while you wait for Clean Clinic or Mouse Found bonuses to be added to your score. Make sure you check on her at the end of the day! It’s best if you do this immediately before or after helping the last doctor, just to be safe.
Tip! Maggie being on the middle exam table means you have one less table to work with in the ward today. Keep this in mind as doctors bring in pets, and make sure you cleaner is cleaning tables right away so patients don’t back up too much. If you find yourself dealing with angry doctors, have Jack comfort their animals to improve their mood.
Dr. Cares – Pet Rescue 911 – Level 28
Level 29: Fired?
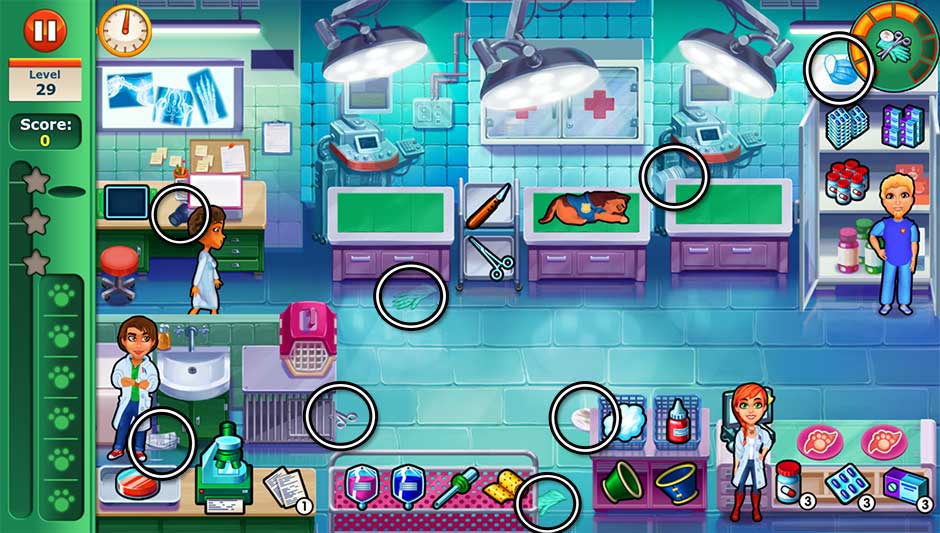
Challenge: Clean up after the operation!
Mouse Location: On the left side of the table containing the spool and surgical sewing supplies.
The operation is finished, but the ward is a mess! A total of 8 items are scattered around the ward today. Locate and click on all of them before the end of the day to complete today’s challenge. The item locations are pictured here:
Dr. Cares – Pet Rescue 911 – Level 29
Tip! Maggie is still on the middle exam table while she recovers, so you will only have 2 exam tables to work with today.
Level 30: A Great Team
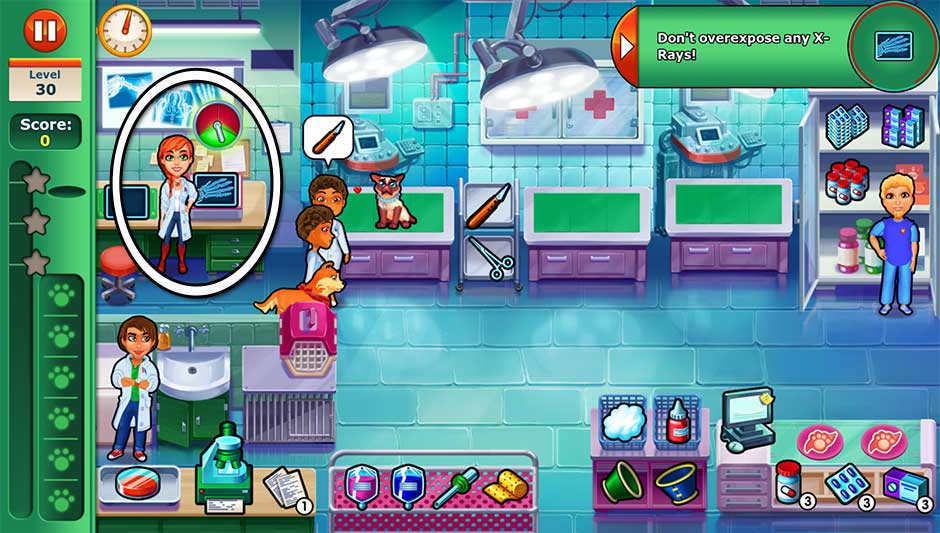
Challenge: Don’t overexpose any X-Rays!
Mouse Location: On the right side of the animal cages, next to the travel carrier.
Today’s challenge is to use the x-ray machine without overexposing any x-rays. Once you start developing an x-ray, a circular meter will appear showing the development progress. When the needle lands on the green zone, click on the x-ray to put it on your tray. If you click on it while the needle is in the red, the x-ray will be overexposed. Only develop x-rays when a doctor asks for them.
Tip! Only doctors at an exam table will ask for x-rays.
Dr. Cares – Pet Rescue 911 – Level 30
Chapter 4 – Animal Shelter
Eager to make a difference, Amy takes on a position volunteering at the local animal shelter. There are plenty of animals in need of love, care, and new homes.
Level 31: Help
Challenge: Get 20 combos, chains or bonuses.
Mouse Location: On the ground to the immediate upper left of the checkout monitor.
Score boosts are all the rage today! Get 20 combos, chains, or bonuses to ace today’s diamond challenge. There are several ways you can do this:
- Quick! – Serve a customer within a few seconds of them ordering.
- Nice! – Serve a customer their full order in a single trip.
- Smart! – Serve customers their full orders back-to-back without picking up new items.
- Sharp! – Clean 2 or more tables back-to-back.
- Checkout bonuses – Checkout multiple customers at the cash register at the same time. Note: You can check out four or more customers for huge bonuses!
- Mouse – Find today’s hidden mouse (see Mouse Location above). Note: This bonus is added at the end of the day.
- Clean clinic – Make sure all tables are clean at closing. Note: This bonus is added at the end of the day.
Level 32: Little Lady
Challenge: Fufu wants to play hide and seek! Find her!
Mouse Location: On the left side of the dirt path, below the entrance gate.
Little pink puppy Fufu is in a playful mood. Throughout the day, Fufu will pop out of various locations in hopes you’ll find her. Click on her when she comes out of hiding to play with her. Find her 5 times before the end of the day to complete today’s challenge. You can see Fufu’s hiding spots here (shh, don’t tell her!):
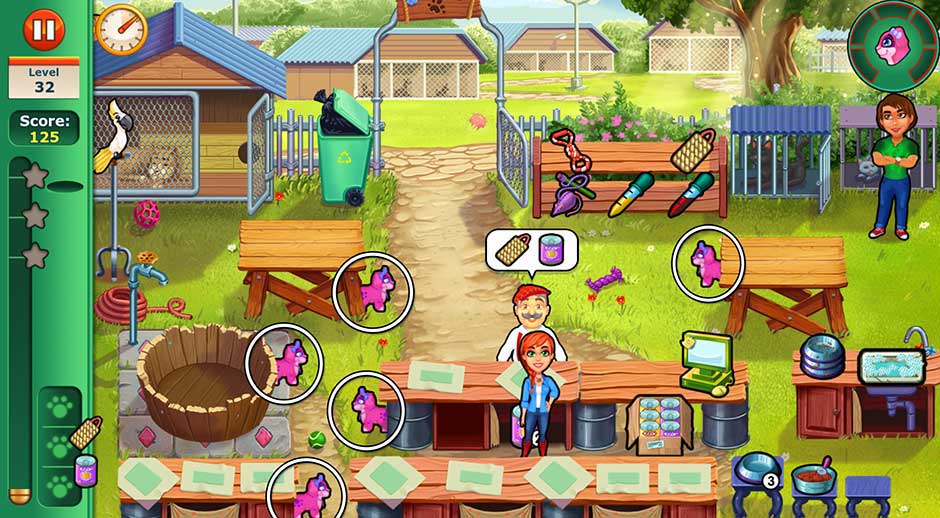
Dr. Cares – Pet Rescue 911 – Level 32
Level 33: Funding
Challenge: Entertain at least eight pets.
Mouse Location: On the left side of the checkout counter.
It’s time for Newton to earn his keep! Today’s challenge is to entertain at least 8 pets. Every time a customer brings a pet in, it’s time to send Newton to work. Click on Newton on his perch on the upper left, then click on the pet you’d like to entertain. Newton will fly over and do his thing, improving the pet’s mood.
Tip! You can entertain a pet at any time up until the owner picks them up and leaves. If you entertain a pet while their owner is at the register, it will improve their mood and they’ll leave larger tips. Note: A customer with a heart icon is at the maximum happiness level. Entertaining a customer with a heart will keep them happy, but will not increase your score at the register any further.
Level 34: Spirit Animals
Challenge: Crystal is helping out – give her what she needs.
Mouse Location: On the right side of the bottom left counter containing the shampoos and cleaning supplies.
Crystal will pop in and out of the shelter today. Whenever she appears, she will ask for an item. A bubble will pop up over her head displaying the item she wants. Click on the item and bring it to Crystal before the green color drains from the bubble. If you don’t bring her an item in time, she will leave. But don’t worry – she’ll be back! Successfully bring Crystal supplies 5 times before the end of the day to earn another diamond.
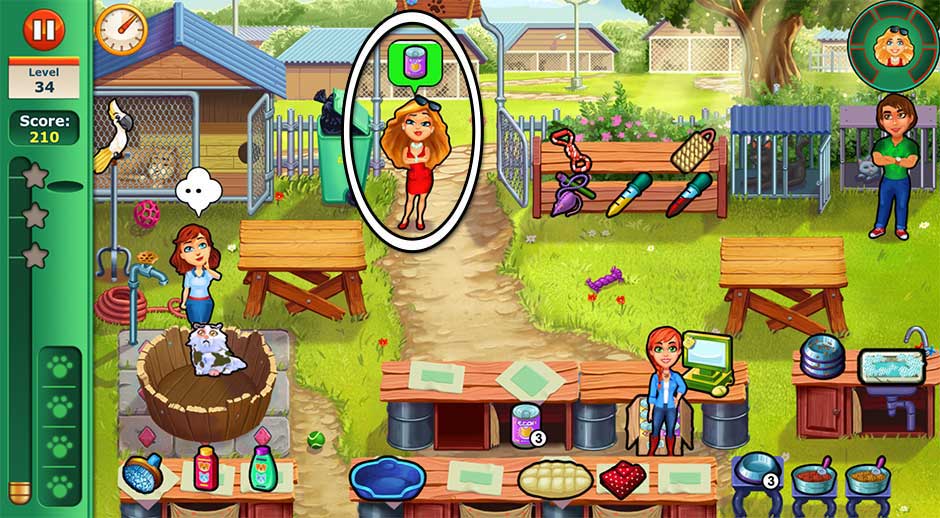
Dr. Cares – Pet Rescue 911 – Level 34
Level 35: Girl with a Plan
Challenge: Help Lisa make sure nothing stays dirty for more than 10 seconds.
Mouse Location: Behind the top of the checkout counter, between the cloth mats.
Today requires you to be on your A-game with cleaning. Watch owners closely after you check them out at the register. The moment they collect their pet and a “!” icon appears over a table, click on it immediately! It can take Lisa a few seconds to reach the table and clean it, so every second counts. The same goes for the bath. Keep in mind the farther the “!” is from Lisa, the longer it will take her to get to it. Make sure you never wait more than a few seconds at any time.
Tip! Be careful not to let customers back up too much today, and go light on checking them out in large groups at the register. If 2-3 tables and/or the bath are dirty at the same time, there’s a high risk that Lisa will not be able to clean them in time. Even if you click on a table within the 10 second timeframe, it will not reset the 10 second clock until it’s completely cleaned.
Level 36: Doubts
Challenge: Don’t ever let an item run out of stock!
Mouse Location: On the ground on the right side of the entrance gate.
There are only 2 items you need to worry about today: canned food and food bowls. A number icon on the lower right of each displays how many are in stock. To restock the canned food, click on the box of cans underneath the checkout monitor. To restock the food bowls, click on the stack of dirty bowls on the sink on the right, then click on the sink filled with water to wash it. The maximum number of cans and bowls that can be in stock at any time is 3. Make sure at least 1 of each is in stock at all times throughout the day to complete today’s challenge.
Tip! Customers will sometimes throw curveballs. For example, a couple customers may show up at the register at the same time, and between them, order 3 cans of canned food. Be careful not to put all your stock on your tray. Instead, serve one customer, restock, then serve the other. The number of cans or bowls available can never drop below 1.
Level 37: Feline Trouble
Challenge: Check the kitten’s I.V. regularly!
Mouse Location: Behind the sink on the right side of the screen.
Check on the kitten regularly throughout your shift today. The kitten is sitting on the rightmost exam table. A meter above him will deplete quickly over time. Check on the kitten before the bar reaches 0%. You will need to do this repeatedly all throughout the day. Remember that even if Amy is busy with other tasks, as long as you click on the kitten before the bar reaches 0%, the bar will stop depleting until Amy checks on him.
Tip! The kitten will take up the rightmost table for the whole day, which means that you will only have 1 table available for other pets today. Don’t let these customers back up at the register, or incoming customers can become angry easily. Use Newton to improve their mood as necessary.
Tip! The kitten’s bar will keep depleting up until the day’s final bonuses are tallied, after the last customer has left. Make sure you check on the kitten at least one more time right before or after checking out the final customer.
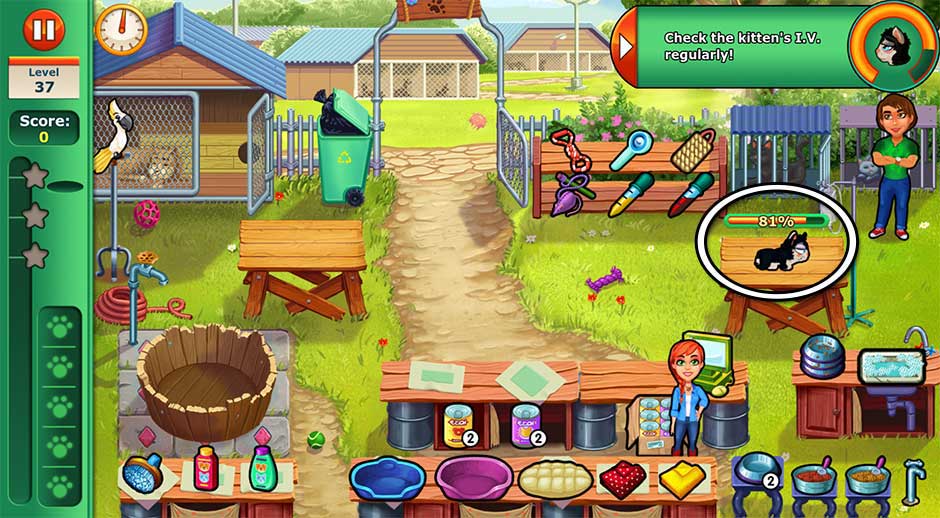
Dr. Cares – Pet Rescue 911 – Level 37
Level 38: Pressure’s On
Challenge: Never take a product that hasn’t been ordered.
Mouse Location: In front of the kennel with the blue roof on the upper right.
Only pick up products that customers order today. If you have to remove any items from your tray, you will fail today’s challenge. Focus on serving customers, and don’t panic! It’s better to take an extra few moments and get the order right. Succeed in this endeavor, and you’ll earn a diamond for A+ customer service.
Level 39: Fundraiser
Challenge: Clean up the shelter!
Mouse Location: On the right side of the checkout counter, next to the checkout monitor.
The shelter is a mess today. There are a total of 5 areas in need of cleaning. When you start the day, a “!” bubble indicates where these areas are. Click on the items to clean them up. A bar will appear showing your progress. Focus on cleaning up the messes every spare moment you get between helping pets and customers. Clean everything up before day’s end to complete today’s challenge.
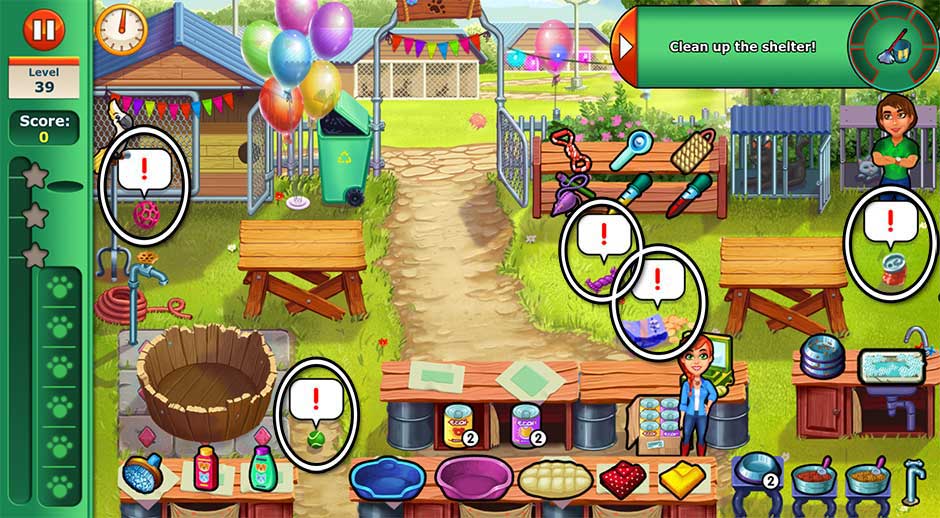
Dr. Cares – Pet Rescue 911 – Level 39
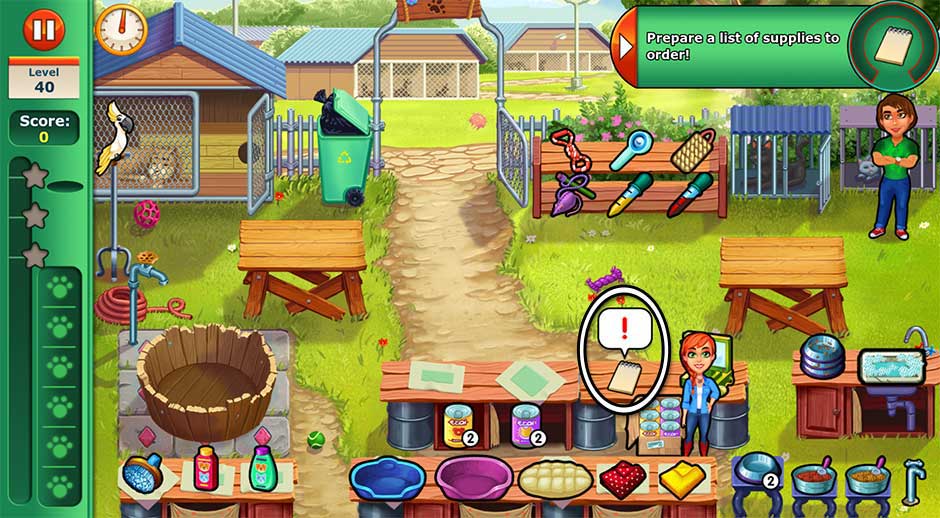
Level 40: A Toast!
Challenge: Prepare a list of supplies to order!
Mouse Location: On the right side of the wooden bath near the lower left corner.
Today you’ll notice a notepad next to the register marked with a “!” bubble. Click on the notepad to have Amy make a list of supplies she’ll need to order. A meter will appear showing Amy’s progress. Work on the list whenever you’re not helping customers. Complete the list before day’s end to earn another diamond.
Dr. Cares – Pet Rescue 911 – Level 40
Chapter 5 – Horse Stables
High society awaits at the horse stables, where career and reputation reign supreme. The world of competitive racing can be a slippery slide however, and Amy will need to make an important choice.
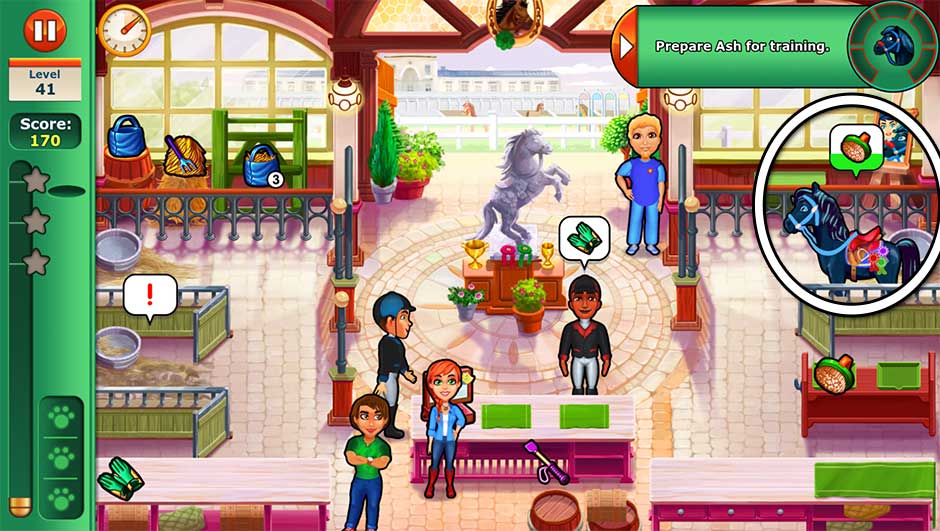
Level 41: Ahem
Challenge: Prepare Ash for training.
Mouse Location: In the center of the window on the upper right.
Ash is the beautiful black horse with a stable all to herself on the right. Throughout the day, she’ll need special treatment. A bubble displaying an item she needs will pop up over her. Click on the item and bring it to her before the green color drains from the bubble. Repeat this a total of 5 times before the end of the day to earn a diamond worthy of a champion.
Dr. Cares – Pet Rescue 911 – Level 41
Level 42: Kingsley Clan
Challenge: Don’t keep products on the tray for longer than 10 seconds.
Mouse Location: On the floor below the entrance, near the cleaner.
Don’t keep products on your tray for more than 10 seconds at any time today. That means serving customers within 10 seconds of picking up the item they need. Be careful when lining up combos, especially if it involves the brush. Any time you spend brushing a horse while having another item on your tray will count toward your 10-second time limit. If you see a customer ask for the brush, pick it up separately from any other items. The trick is serving customers quickly.
Level 43: Another World
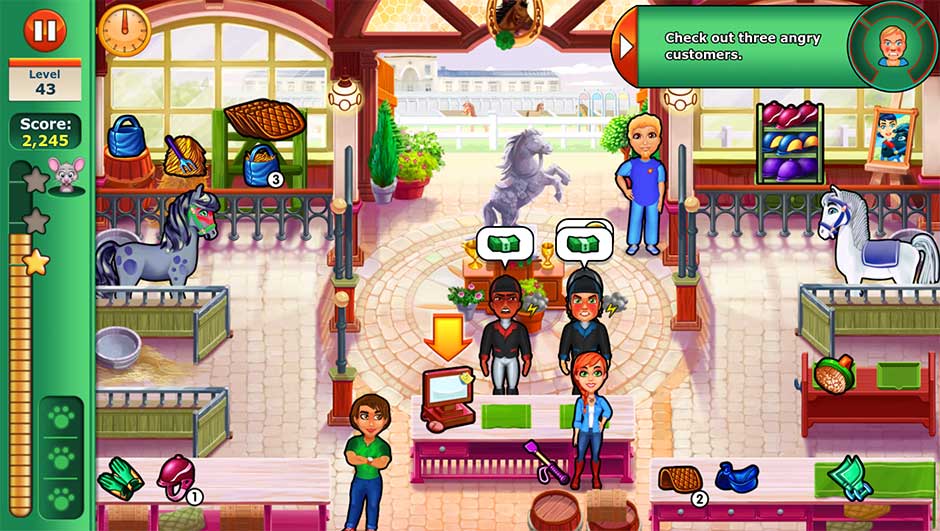
Challenge: Check out three angry customers.
Mouse Location: On the left side of the checkout counter, next to the checkout monitor.
Today’s challenge is all about timing. You’ll need to check out 3 angry customers today. An angry customer is recognizable by their flustered red face, accompanied by a thunder cloud and lightning if they’re very angry. The best trick to use today is to focus on the day as per usual, checking out happy and ecstatic customers. That is, up until the last portion of the day. When the clock on the upper left shows about 10-15% of the day remaining, this is when to start addressing today’s challenge. Serve 3 customers slowly, ensuring you don’t improve their mood upon giving them the product they’ve asked for. Check them out at the register once their faces are red and/or a thunder cloud appears next to them. Be aware that once a thunder cloud has appeared, you will only have a handful of seconds to check this customer out or bring them their product before they walk out without paying. Customers who walk out do not count toward today’s goal.
Tip! You can also spot an angry customer at the register by the number of coins stacked next to the green dollar bills over their head. A customer with no coins visible next to the dollar stack counts as an angry customer. Use this trick to tell whether or not a customer behind another one is angry or not.
Tip! Use Jack as your checks and balances system. If you end up with more than 3 angry customers at the end of the day, have Jack reassure the animals of anyone in line to improve their score and minimize the number of angry customers. But remember – you need 3! Make sure you’ve also found today’s mouse and cleaned all stalls before the last customer leaves to score additional score bonuses you’ll need.
Dr. Cares – Pet Rescue 911 – Level 43
Level 44: Possessions
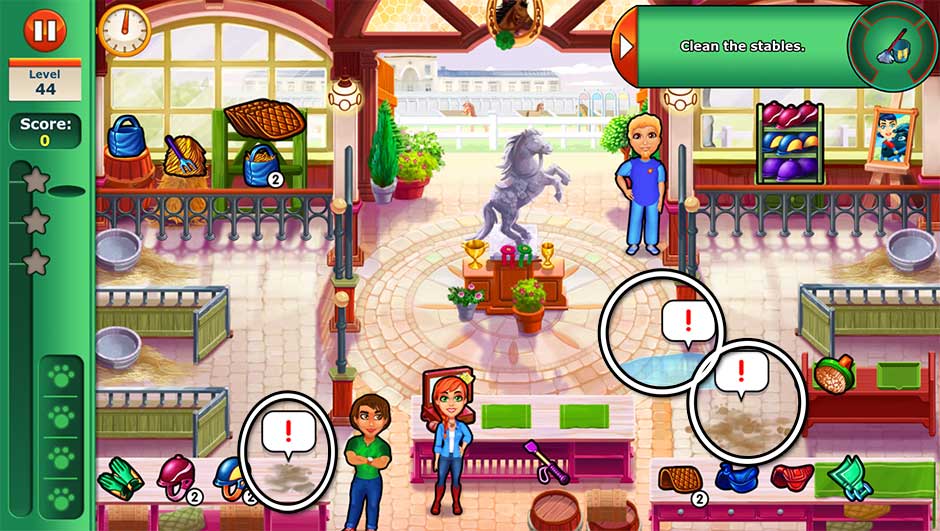
Challenge: Clean the stables.
Mouse Location: Behind the top of the checkout counter, to the immediate right of the checkout monitor.
The stables are messy today, and it’s up to you to clean them. A total of 3 areas are marked with “!” bubbles at the start of the day. Clean all 3 areas every spare chance you get. If you finish them all before the end of the day, you’ll earn another diamond.
Tip! Focus on one mess at a time to keep easier track of your progress.
Dr. Cares – Pet Rescue 911 – Level 44
Level 45: Suspicions
Challenge: Earn the first star in the first half of the day.
Mouse Location: On the floor below the entrance, on the left between the statue and the topiaries.
Restock the hay, helmets, and riding blankets right away once the day starts. Focus on serving customers quickly and keeping them as happy as possible. Use Jack to improve the moods of any animals and their riders who don’t have heart icons next to them. Check out riders in groups at the register, but once the day nears the halfway point, don’t focus on checking them out in groups. Instead, check them out quickly for quick bonuses.
Tip! If you find yourself struggling today, try purchasing an upgrade at the start of the day! Upgrades can increase Amy’s speed, customer patience, tips, and more.
Level 46: Unbelievable!
Challenge: Keep Sherman away from Ash!
Mouse Location: On the right side of the center stable divider on the left.
Sherman keeps sneaking into the stables today. Make sure he never gets too close to Ash. Sherman will stop in 2 locations before reaching Ash. Click on him at any point between these 2 locations to have Amy kick him out. Sherman will dawdle on the left side of the entrance doorway, as well as next to the pillar in front of Ash. Do your best to prevent him from reaching the pillar. He will show up multiple times today, so keep an eye out.
Tip! Sherman can be hard to spot if there are riders waiting for available stalls. Try to keep at least 1 stall clean and open at all times. Only 2 stalls are available to riders today since Ash is occupying the stall on the right.
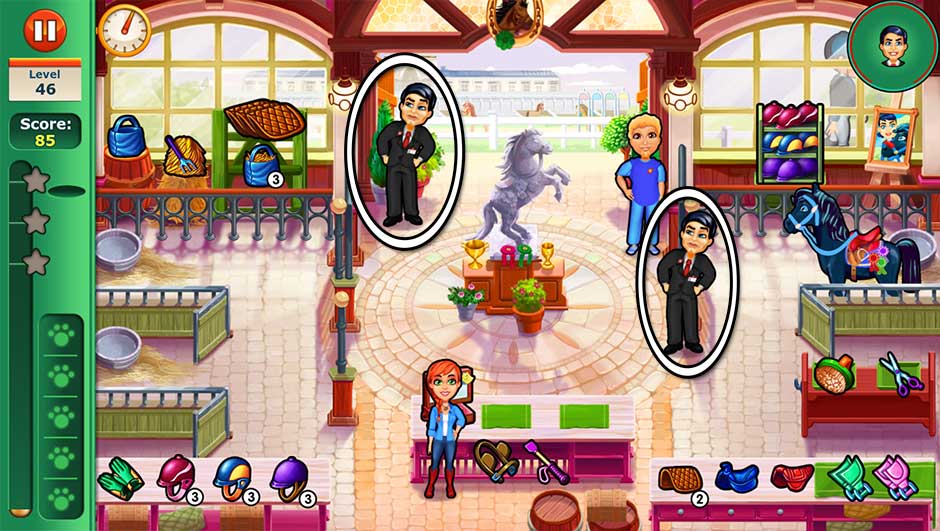
Dr. Cares – Pet Rescue 911 – Level 46
Level 47: Red Handed
Challenge: Play with Maggie!
Mouse Location: On the left side of the rightmost counter where the brush and scissors are kept.
Maggie’s in a playful mood. Throughout the day, Maggie will wander into the stables. When she sits in front of the pillar by Ash’s stall, a “!” bubble will appear over her head. Click on Maggie before the green color drains from the bubble to play with her. As long as you click on her before the color drains, even if Amy is working on other tasks, Maggie will wait until she plays with her. If you don’t click on Maggie in time, she’ll frown and leave the stables. But don’t worry too much if this happens – she’ll be back. Play with her a total of 5 times before the end of today to complete the day’s challenge.
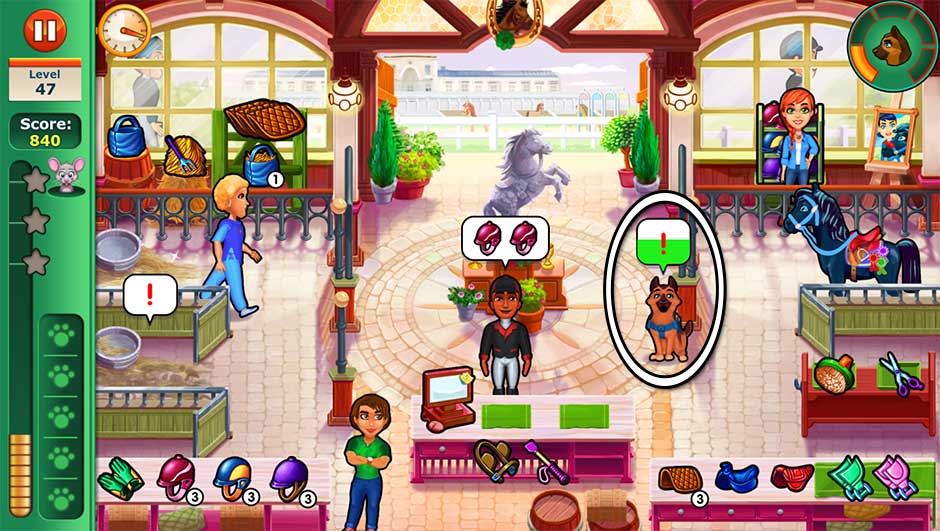
Dr. Cares – Pet Rescue 911 – Level 47
Level 48: Disqualified
Challenge: Prepare a new horse for Jade to train with.
Mouse Location: Behind the saddle blanket rack in the upper left corner.
Jade requires a new horse. Help prepare the new horse, located in the stall on the right where Ash was previously. Bubbles will pop up over the horse displaying an item. Click on the item and bring it to the horse before the green color drains to help prepare it. The color drains quickly, so as soon as you see it, put highest priority on preparing the horse. Do this a total of 5 times before the end of the day to earn a diamond for your troubles.
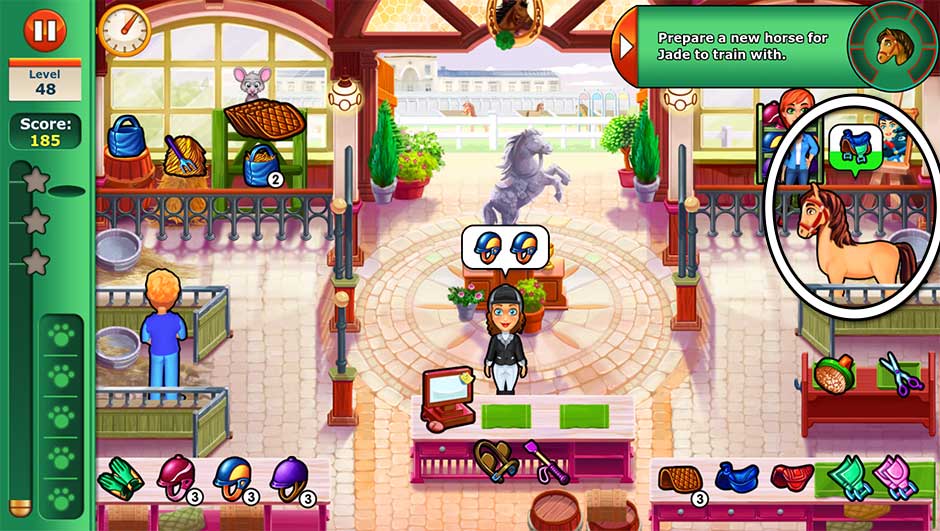
Dr. Cares – Pet Rescue 911 – Level 48
Level 49: Loss
Challenge: Make sure no-one has to wait for a clean stall.
Mouse Location: On the floor to the right of the checkout counter.
Stall management is your priority today. In order to complete today’s challenge, no riders can wait for a stall at any time. The best way to manage this is to make sure at least 1 stall is clean and open at all times. Go easy on checking customers out in groups at the register today, and instead focus on serving riders quickly and cleaning up those stalls, pronto!
Level 50: The Last Straw
Challenge: Find Ash’s awards.
Mouse Location: On the right side of the pillar on the left, between the water fountain trough and checkout monitor.
Ash is a winner no matter what, and finding her awards is only proof of that. Find all 7 awards scattered throughout the stables. Their locations are shown below. Find all 7 before day’s end to earn your final diamond for the chapter.
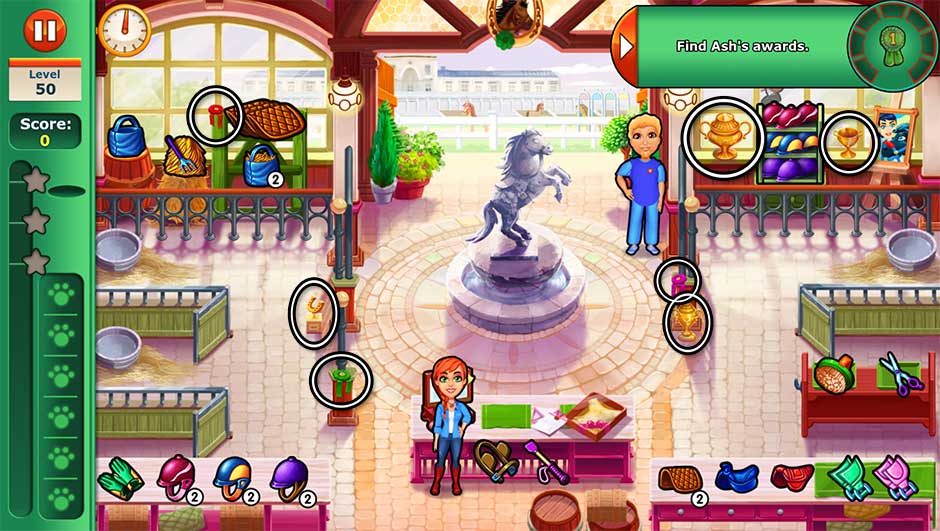
Dr. Cares – Pet Rescue 911 – Level 50
Chapter 6 – Arthur’s Clinic
So much has happened. Eager to get away, Amy returns to Arthur’s Clinic as her grandfather prepares to pack the final boxes and sign the clinic over to new owners. What sort of future awaits?
Level 51: All the Time…
Challenge: Serve 20 ecstatic customers!
Mouse Location: Behind the divider in the upper left corner, in front of the refrigerator.
Arthur’s Clinic is known for its personable service. Today’s challenge is to serve 20 ecstatic customers. An ecstatic customer not only has a huge smile on their face, but a heart next to it, too. Serve customers quickly and check them out without a hitch to count them toward your goal. If you need an extra boost for customers with pets, Newton is perched on the left side of the clinic and can entertain their pets, improving their mood.
Level 52: Boys
Challenge: Keep Amy busy. Don’t stay still for more than 10 seconds.
Mouse Location: On the floor in front of the terrarium where the turtles are kept.
Today’s challenge requires you to always be on your toes. Don’t stay still for more than 10 seconds. When you’re not helping customers and no one’s at the register, there’s a useful trick to keep Amy moving. Alternate clicking on the checkout monitor and the aqua-colored pill on the right. Only click the pill once. That way, when you click on the register again, Amy won’t have anything on her tray. If there are customers at the register you’re waiting on in hopes of making a checkout combo, try refilling the pet food instead, or click on the box of bowls to restock them. Even if there’s no actual restocking to be done, Amy will still move to the location you click, helping you in today’s challenge.
Tip! Make sure Amy has just moved as soon as your last customer leaves, so you have enough time within that 10-second timeframe for your bonuses to be applied to your score.
Level 53: Secret Recipes
Challenge: Help Arthur pack away the clinic.
Mouse Location: On the left side of the checkout counter, near the pet bed and terrarium.
There’s packing to be done today. A total of 3 areas in the clinic have been marked for packing, indicated with a “!” bubble. Click on the areas to start packing. A bar will pop up displaying your progress. Pack items away every spare chance you get when you’re not serving customers. Newton will be your little helper today by helping to keep customers patient. Simply click on him, followed by a pet, to have Newton entertain them. Finish packing away all the items before the day ends to complete today’s challenge.
Tip! As soon as the day starts, fully restock all items (food bowls, chip, and pet food). This will save you time for packing. Remember the maximum stock for the bowls and pet food is 3, while the maximum stock for the chip is 1.
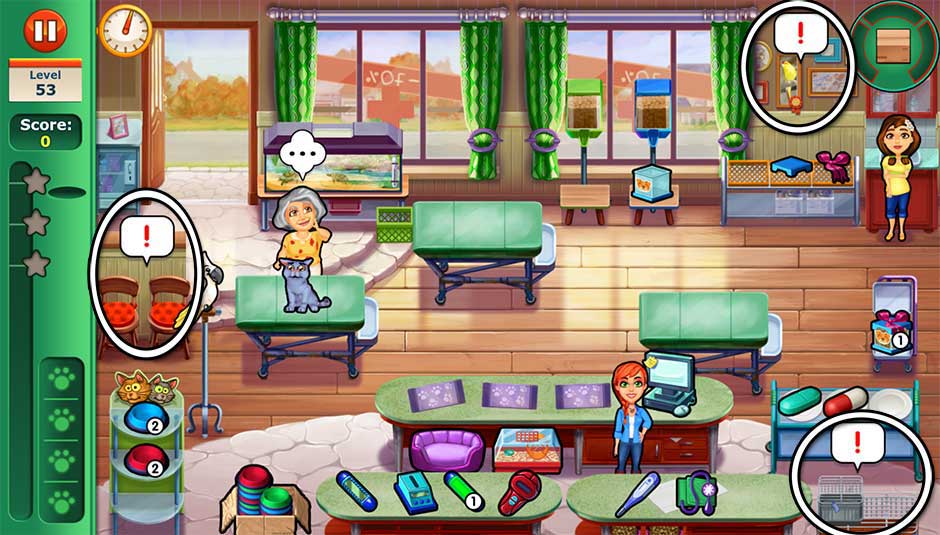
Dr. Cares – Pet Rescue 911 – Level 53
Level 54: Party! Party!
Challenge: Receive party supplies from Crystal!
Mouse Location: On the right side of the rightmost grooming table, above the table with the pills.
Crystal’s stopping in to help out today. Whenever she shows up, she’ll stop next to the leftmost exam table. A “!” will appear over her head. Click on Crystal before the green color drains from her bubble to collect the supplies from her. You will need to do this a total of 3 times before the day ends. Keep in mind that Amy will need time to carry the supplies she collects from Crystal, so use Newton to help keep customers patient.
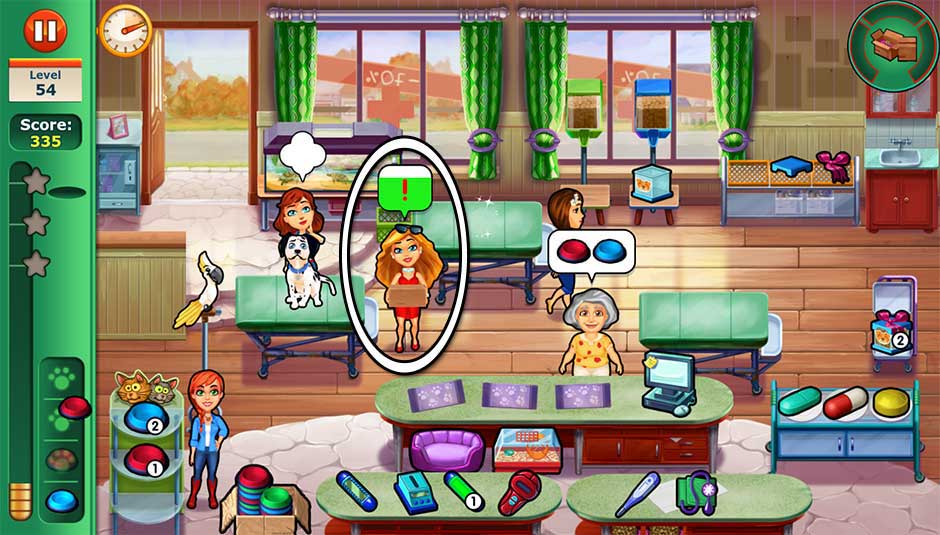
Dr. Cares – Pet Rescue 911 – Level 54
Level 55: Best Friends
Challenge: Take care of Scrappy’s check up!
Mouse Location: In the window to the immediate right of the terrarium containing the turtles.
A familiar face is in for a checkup today. Scrappy will be on the left exam table, which means you will have only 2 for normal customers today. Whenever Scrappy needs something, a bubble will pop up over his head displaying the item he needs. Collect the item and bring it to Scrappy before the green color drains. Do this 5 times before the end of the day to achieve your goal.
Tip! Only 2 exam tables means it’s easy for customers to back up today. Try to check customers out in smaller groups, and use Newton to entertain pets while they wait on the exam tables.
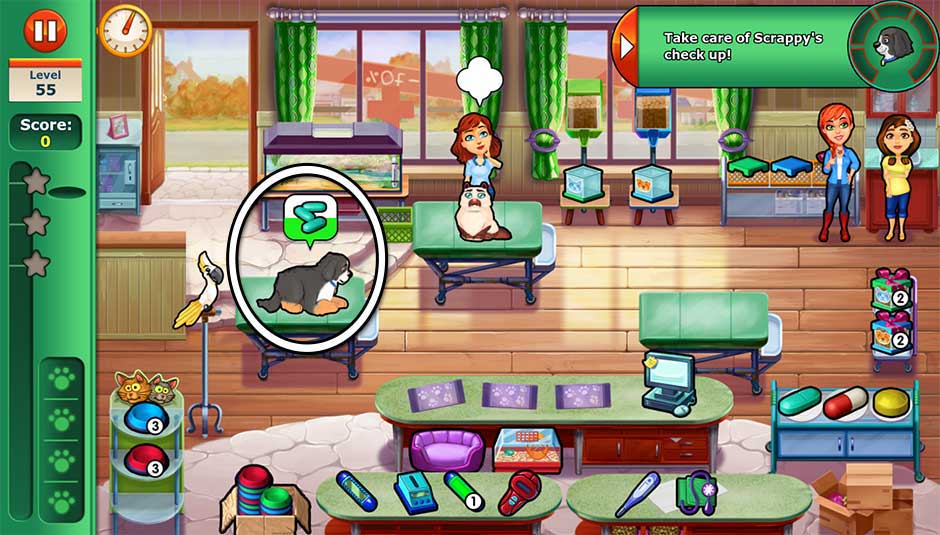
Dr. Cares – Pet Rescue 911 – Level 55
Level 56: Wants and Needs
Challenge: Get 10 quick bonuses!
Mouse Location: On the right side of the divider below the door, near the leftmost grooming table.
Serve customers their complete order within a few seconds of them ordering to acquire a quick bonus. Successfully serve customers quickly 10 times before the day’s end to earn today’s diamond.
Level 57: Trial and Error
Challenge: Send invitations to Arthur’s retirement party!
Mouse Location: On the left side of the center grooming table, below the terrarium where the turtles are kept.
It’s time to send invites out for Arthur’s retirement party. Amy’s purple laptop can be found between the chip-reader and thermometer on the bottom counter. At the start of the day, a “!” bubble will pop up over her laptop. Click on the laptop to have Amy send out invitations. A meter will pop up over the laptop displaying her progress. You will need to fully fill the bar a total of 3 times by the end of the day to succeed. Use Newton to keep customers happy, and otherwise focus on sending invites every spare moment you’re not helping a customer.
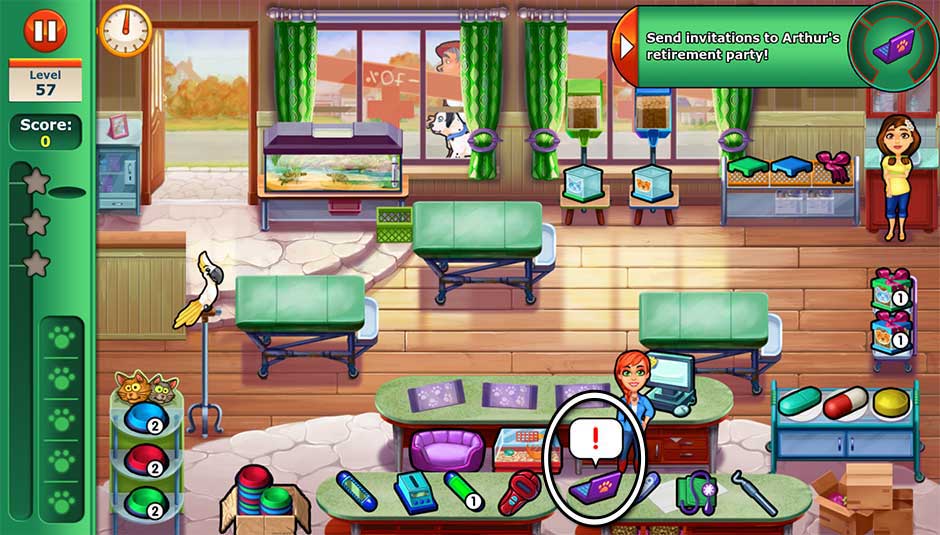
Dr. Cares – Pet Rescue 911 – Level 57
Tip! Take breaks to restock your items as necessary. Don’t worry about keeping all items fully stocked. Instead, simply make sure nothing is out of stock while you’re sending invites. If you’re quick, you can refill both varieties of pet food at the same time. Click on the green container, immediately followed by the blue. While both are filling up (shown via a circular meter), get ready! As soon as the first (green) is ready, click on the container, followed by the green top and pink ribbon. If you’re quick, as soon as you’re finished with the green container, you can immediately click on the blue and repeat the process. This will make refilling the food twice as fast: two birds, one stone.
Level 58: The Giveaway
Challenge: Find a new home for Arthur’s turtles.
Mouse Location: Behind the upper right corner of the counter with the pills, near the lower right side of the room.
It’s time for the escape-artist turtles to find a new loving home. Customers will walk in throughout the day asking to adopt a turtle. These customers will stop in the doorway, and a bubble over their head will pop up displaying the turtle icon. Bring them a turtle before the green color completely drains from their bubble. Click on the turtle in the terrarium by the window, then click on the customer to send them off with happy turtle in hand. Adopt out all 8 turtles by the end of the day – a diamond will be your reward.
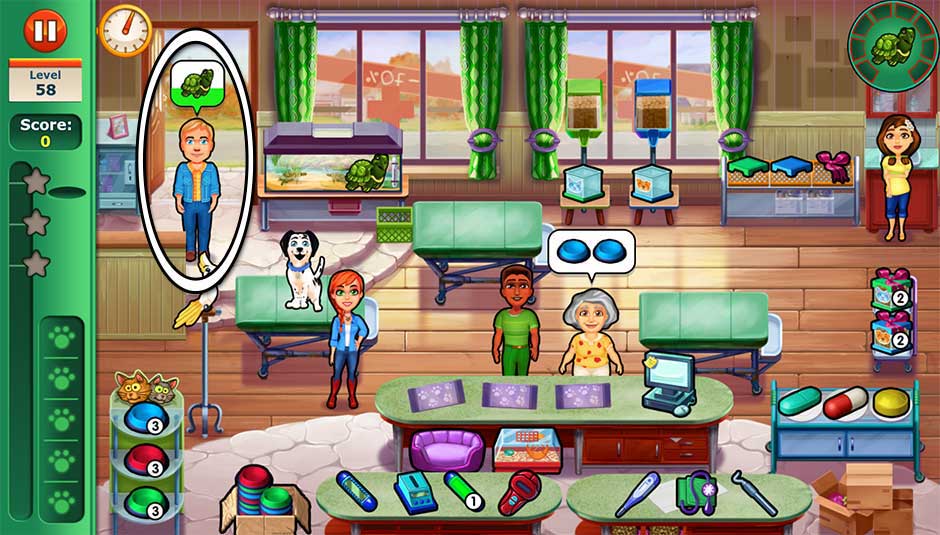
Dr. Cares – Pet Rescue 911 – Level 58
Level 59: Closure
Challenge: Help Crystal set up Arthur’s retirement party!
Mouse Location: Behind the top of the food bowl rack on the lower left.
As Newton would say: Party! Party! Time to decorate. There are 3 areas where decorations need to be put up, each marked with a “!” bubble at the start of the day. Click on these areas to have Amy start setting up for the party. A meter will appear showing her progress. Finish putting up all the décor before the day ends to complete today’s challenge.
Tip! The exam table on the right has been replaced with a table for the party. That means you will only have 2 tables available for pets and their owners today, so plan accordingly! You will need to check customers out faster and keep them from waiting at the register in order to prevent them backing up too much at the door.
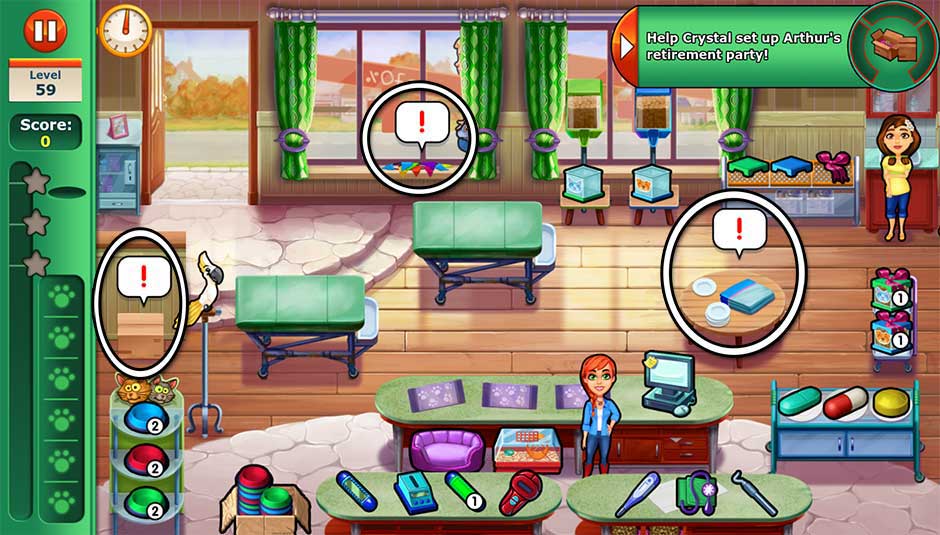
Dr. Cares – Pet Rescue 911 – Level 59
Level 60: The Big Day
Challenge: Read Amy’s old pros and cons list… Things change, don’t they?
Mouse Location: On the right side of the centermost grooming table, below the food dispensaries.
Hindsight is 20/20, as Amy dwells on today. A notepad can be seen on the left end of the checkout counter. You’ll be playing Arthur while Amy reflects. Watch for the “!” bubble that pops up over the notepad. Click on it before the green color drains to have Amy go over to it and reflect. During this time, you don’t need to worry about it interfering with your work, since you’ll be playing her grandpa. Click on the notepad successfully when the “!” appears 4 times over the course of the day to complete the final story challenge.
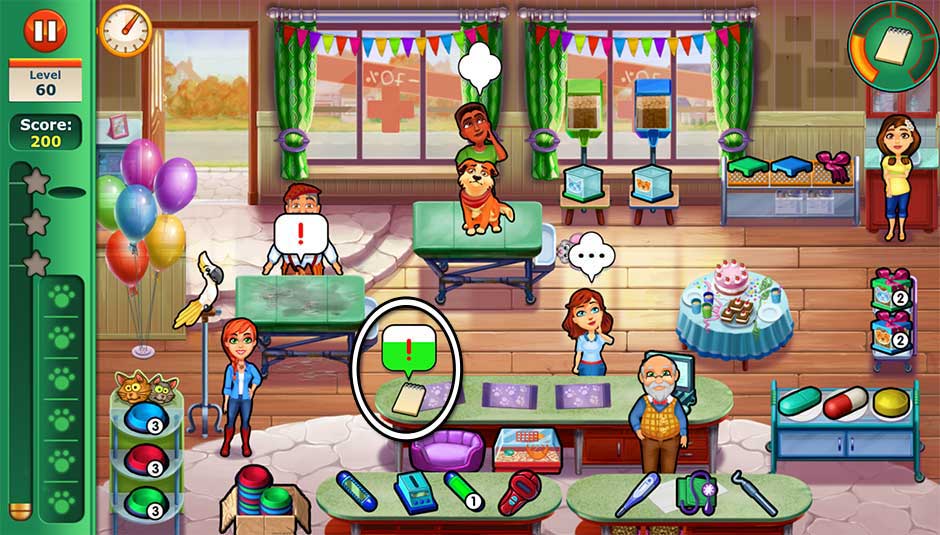
Dr. Cares – Pet Rescue 911 – Level 60
Congratulations! You’ve completed Dr. Cares – Pet Rescue 911!
Challenges
A total of 30 challenges await you in Dr. Cares – Pet Rescue 911. This section of our walkthrough provides a guide for each individual challenge, including tips, tricks, and strategies on how to complete them all.
– Chapter 1 – Arthur’s Clinic –
Challenge 1
Challenge: Catch all the mice!
There’s so many mice in the clinic today, it’s practically an epidemic! Mice will pop up all over the place. Listen for the tell-tale squeak indicating a mouse has popped up. When you spot a mouse, click on it. You will need to find a total of 12 mice before the day’s end to complete this level’s challenge. Mice tend to pop up in the same places they do in story Levels 1 – 10. For a visual reference, click here to see Mouse Locations.
Challenge 2
Challenge: Work with a slowly breaking tray!
At the start of the day, you will have 4 spaces on your tray. As the day progresses, these spaces will begin to disappear, until you eventually end up with only 1. Serve customers full orders back-to-back as much as you can in the earlier part of the day. As soon as the tray starts to break, focus on only serving full orders to a single customer. By the time there’s only 1 slot left, you will need to make multiple trips for anyone ordering more than one item. Use Newton to keep customers and pets happy! Complete the level with 1 star to conquer today’s challenge.
Challenge 3
Challenge: Customers come in large groups. Make sure everyone’s happy.
Customers will show up in large groups today, averaging about 5 customers at a time. Try to serve everyone at the same time and split orders into 2 large groups: a first and second set of full orders for 2-3 customers. If you time things correctly, you should have 4-5 customers at the register ready to check out at a time. Click on the register to send them on their way. If you succeed in having 4+ customers checked out at once, you will receive Purrfect combos. Not only are these great for your score, but they also count toward the Purrfect! trophy achievement.
Tip! Don’t forget to use Newton’s entertainment talents to keep owners and pets happy while they wait!
Challenge 4
Challenge: Alternate between counter and vet table customers.
Today’s challenge requires you to alternate between counter and vet table customers. Vet table customers always enter with pets, whereas counter customers show up alone. It’s important to serve full orders to these customers in order to keep things simple today. Try to serve a customer as soon as they come in. If you fall behind, it can be hard to keep track of who you need to serve next. Customers will enter in pretty consistent alternating ratios, however at some point in the day, 2 counter customers will show up back-to-back. When this happens, serve the first, but wait to serve the second. You will need to serve an incoming vet table customer first before you can serve this counter customer. Keep alternating between customer types for the entirety of the day to complete today’s challenge.
Tip! If you have a counter customer and a vet table customer ordering at the same time, try moving your mouse cursor over the customer you need to serve next. This will help you keep track while you wait.
Challenge 5
Challenge: Don’t remove any items from your tray!
Balance is the key word today. Get through the day without removing a single item from your tray – that means perfect orders! Serve customers orders as per normal, and don’t get flustered. If you find yourself moving too quickly or feeling overwhelmed, pause for a moment, and let Newton keep the customers happy. As long as you don’t remove any items from your tray, you’ll be just fine.
– Chapter 2 – Pawsitive Clinic –
Challenge 6
Challenge: Serve the VIPs first!
VIP, incoming! Serve the VIPs first. VIPs are recognizable by their slick black suits and cool glasses. If these customers are ordering and the “…” bubble is visible over their head, make sure you serve them before taking care of any other customers. Do this successfully for the duration of the day to complete today’s challenge.
Challenge 7
Challenge: Receive additional points for entertaining pets!
Score! Today’s challenge is icing on the cake. Click on Jack, followed by a pet on a table for him to entertain. Entertaining pets not only increases your score, but improves both pets’ and customers’ moods. You don’t have to entertain every pet that comes in, but the more you do, the higher your score will be.
Challenge 8
Challenge: Get that mouse what he wants!
Carl is back, and it looks like he wants to enjoy the perks of the pet boutique, too! Carl the mouse will pop up on the left side of the clinic, below the first grooming table. A bubble with an item will pop up over his head, letting you know what he wants. Click on the item and bring it to him before the green color drains from the bubble. You will need to do this 5 times before day’s end to complete the challenge.
Tip! One of the items the mouse will want is a cup of coffee with a cookie. The coffee can take a while to brew, so It can be difficult to get the product to him in time. Therefore, it’s a great idea to make a cup of coffee at the start of the day and keep it on your tray. That way when he asks for the coffee, it’s ready to go!
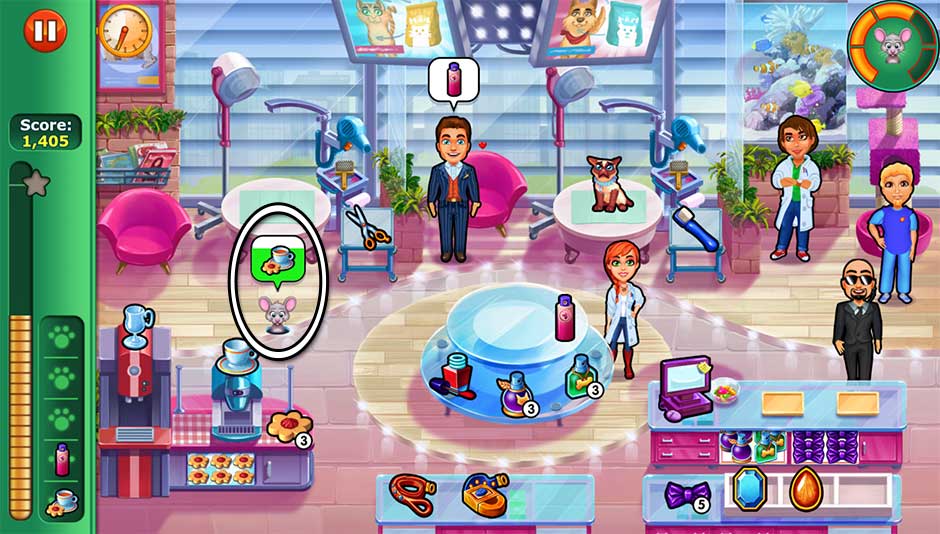
Dr. Cares – Pet Rescue 911 – Challenge 8
Challenge 9
Challenge: Don’t take the same product twice in a row.
Today’s challenge requires that you never pick up the same product twice in a row. That means if you pick up the nail polish, you will need to pick up another item before you can pick up the nail polish again. A very useful trick you can use today is to keep your cursor hovered over the last item you picked up. That way when a customer orders, simply glance at your cursor. If it’s over a different item, pick up that item, then move your cursor over that item instead. If it’s over the same item, either wait for another item order of a different kind, or pick up something else before picking up the item your cursor was over. Any extra items you pick up to avoid picking up the same product twice in a row can be removed by clicking the item on your tray. Never pick up the same product twice in a row, and you’ll win the challenge at the end of the day.
Challenge 10
Challenge: You’ll need to memorize your customers’ orders.
After a customer orders today, their order will eventually disappear. The items displayed over their head will be replaced with a “?”. Therefore, it’s important to try and serve customers as quickly as possible today. If you’re quick enough, you may never even see the order disappear! Orders will disappear a handful of seconds after they pop up over a customer’s head.
– Chapter 3 – Critical Care –
Challenge 11
Challenge: Only use one slot on your tray!
Today’s challenge requires you only use 1 slot on your tray. There’s a few tricks you can use to stay on track today.
- Don’t worry about full orders. Doctors ordering 2 items will need to have their order split up, and you’ll need to take 2 trips. Remember: only 1 slot!
- Click on the goal again. Click on the goal in the upper right corner after it disappears to make it appear again. When you do this, it will stay extended. This small visual cue can help you stay on track.
- Counter customers are the trick. Only doctors at the counter will order more than 1 item at a time. Keep this in mind while serving customers.
- No order combos today. Do not serve multiple doctors back-to-back, or you will fail today’s challenge. Again, only 1 item at a time!
Challenge 12
Challenge: Serve full orders only.
The challenge today requires you to serve full orders to the doctors. Bring all the items a doctor asks for in a single trip. You will need to do this for every doctor today to complete the day’s challenge.
Challenge 13
Challenge: Minigames are harder to complete!
Expert-mode-activated. Minigames are harder to complete today. More bones will be broken in x-rays, and I.V.s will have smaller green zones. If you find yourself struggling, refer to the Minigames section below for strategies.
Challenge 14
Challenge: Don’t waste any products!
Don’t throw anything away today. Be careful not to put any extra items on your tray. Instead, only pick up items as doctors ask for them. If you cross an item off your tray, you will have to restart today’s challenge.
Challenge 15
Challenge: Customers enter in a very bad mood.
It’s just one of those days. All the doctors will enter the ward in a bad mood. For counter customers, bring the items they ask for immediately and check them out as quickly as possible. For exam table doctors, Jack is your best man today. Click on Jack, followed by either the doctor or pet at the exam table. Jack can improve the mood of both the doctor and the pet. Make sure to entertain every incoming pet at least once. If you have time, entertain a pet twice to put the doctor in an ecstatic mood. This strategy is very important in order to obtain a high enough score to complete today’s challenge.
– Chapter 4 – Animal Shelter –
Challenge 16
Challenge: You can only keep two items restocked at any time.
A maximum stock of 2 cans of food and 2 food bowls will be available to you today, instead of the usual 3. You can restock as often as you like, however the maximum quantity restocked will only be 2. Keep this in mind while serving customers, and restock each time one of these products are ordered. Complete the day with limited stock and you’ll earn a diamond.
Challenge 17
Challenge: Amy is very tired.
Amy’s exhausted today, which means she’ll be moving much slower than normal. Restock your products at the start of the day and try to serve customers and group orders according to their area. Your goal should be to pick up products as efficiently as possible and minimize Amy’s walking. Use Newton to entertain customers and pets on the tables or in the bath in order to increase patience and tips. On the plus side, the high volume of customers that will be waiting at the register means plenty of checkout combos. Get through the day with a 1-star ranking to complete the challenge.
Challenge 18
Challenge: Catch all the mice!
Wait, mice aren’t on the adoption list! Better catch them all. All throughout the day, mice will be popping up all over. Click on the mice as soon as you see them. A squeak sound will indicate when a mouse has appeared. Click on 20 mice before the end of the day to complete today’s challenge. Mice pop up in the same locations today as they do during Levels 31 – 40. Refer to the Mouse Locations section to view their hiding spots.
Challenge 19
Challenge: Only happy customers count towards the score.
Today is all about keeping customers happy. A happy customer will have a smile on their face, and may or may not have a visible heart as well. Any customers checked out who aren’t smiling will not count toward your score. Focus on checking out counter customers while they’re still smiling, and use Newton’s entertainment talents to improve the moods of owners accompanied by their pets. As long as you have enough happy customers, you should have no trouble completing today’s challenge.
Challenge 20
Challenge: Work with a slowly breaking tray!
Amy’s tray on the lower left will lose slots throughout the day. The further into the day you are, the more slots will break. Toward the end of the day, only 1 slot will remain. Keep an eye on your breaking tray and serve customer combos at the start of the day. By the end of the day, you will have to make multiple trips to fulfill orders of more than one item. As always, use Newton to help keep customers happy while they wait to be served or checked out.
– Chapter 5 – Horse Stables –
Challenge 21
Challenge: Walk 800 yards!
Have Amy walk at least 800 yards today. A meter in the upper right corner of the screen will fill up the further you walk. Your goal is to fill the meter entirely before the end of the day. The best way to fill the meter quickly is when not serving customers, alternate clicking the checkout monitor and the blue bag used for the hay. You do not have to restock the hay, only click the bag to have Amy move to that location. Then, click on the monitor again. Rinse and repeat until you’ve achieved your goal.
Challenge 22
Challenge: Get the biggest combo 3 times!
Today’s challenge requires you to be purrfect. No, really, that’s the name of the biggest combo! Check out 4 or more customers at a time to earn a Purrfect combo. The best way to do this is to wait until at least one counter customer walks in. They should be the start of your combo, since customers who have horses at the stalls will be done ordering by the time they reach the register. Let these customers pile up, using Jack to keep the horses happy. Then once there’s a group of 4 ready to pay, click on the register and enjoy absolute purrfection. Get this combo 3 times before the end of the day to complete the challenge.
Tip! This level is great to revisit if you’re trying to unlock the Purrfect! trophy. Visit the Trophies section for more information.
Challenge 23
Challenge: Serve the stall customers first!
This challenge is simple, but also easy to overlook. Make sure you always serve stall customers first. If you see a customer at a stall with a “…” over their head, wait for them to order and serve them their order before any counter customers. You do not have to serve stall customers in the order they arrived at the stables, only before any counter customers. Checking out a customer at the register does not count as serving them. Bringing a customer a product does.
Challenge 24
Challenge: Get more than $500 in tips!
Are you ready to put all your combo training to the test? Today’s goal is to earn more than $500 in tips. Earn tips by serving orders quickly, serving full orders, serving customers back-to-back, entertaining horses, cleaning stalls, and checking customers out in groups. Your best strategy is to play through today as you normally would and not overthink your goal. If you have difficulty completing the challenge, check out the location upgrades prior to pressing “Play” to see what available options may help you.
Challenge 25
Challenge: Serve full orders only.
Today’s goal requires you serve customers all the items they order in a single trip. You cannot split up orders, so focus on serving one or two individual customers at a time instead of entire groups. Bring full orders to customers and not only will you complete today’s challenge, but you’ll receive some nice score bonuses, too.
– Chapter 6 – Arthur’s Clinic –
Challenge 26
Challenge: Serve customers in the order they come in!
Order in the clinic! Serve customers in the order they come in through the door. If you find it hard to keep track, a useful trick you can use is to hover your cursor over the next customer you should be helping. Don’t let customers back up too much – keep customers with pets flowing through the clinic quickly and make sure to clean those tables ASAP! If exam table customers back up, it can be very hard to keep track of what order people should be served. Therefore, focus on checking customers out of the clinic as quickly as possible today instead of trying to get checkout bonuses.
Challenge 27
Challenge: Don’t remove any item from your tray!
Pick up items only as customers order them today. If you find yourself feeling overwhelmed, take a moment and breathe. As long as you complete the day with 1 star and without removing an item from your tray, you’ll pass today’s challenge with flying colors.
Challenge 28
Challenge: Only use three slots on your tray!
Today’s challenge requires you to use a maximum of 3 slots on your tray at any time. There are lots of customers today and they will come in large groups. Therefore make sure you’re only picking up a maximum of 3 items at a time. It’s better to serve complete orders for your score, so don’t serve 2 customers with an order of 2 items each at the same time. Instead, don’t be afraid to make multiple trips. Restocking items does not count as an item on your tray.
Challenge 29
Challenge: The customers are very impatient. Make sure they leave happy!
Not only are customers impatient today, but you also won’t have any help from a cleaner. That’s right, you’ll be managing the entire clinic on your own. Thankfully, Newton is still around to keep pets and their owners entertained. Restock all items right away at the start of the day. All incoming customers will be in a bad mood, and it’s imparrotive Newton help cheer them up. For counter customers, focus on serving them and checking them out right away. Serving them quickly will improve their mood, but their patience is still wearing thin. Therefore, you should try and check them out as soon as possible when they’re ready to pay.
Exam table customers with pets are a little different. For these customers, you can use Newton to entertain them. Every time Newton entertains them, both the pet and the owner’s mood will improve. If you serve them quickly, their mood will improve even more. You can even continue to improve their mood with Newton’s entertainment while the owner waits in line! Use this technique only as time allows, however – because remember, you’re cleaning the tables on your own today! When a “!” bubble appears over a table, click on it to clean it. Doing so will take up Amy’s time, so she won’t be able to continue performing other tasks until the table is clean. It’s important not to let table customers back up too much for this very reason. New customers with pets won’t come in until there’s a clean table to go to. The key to today’s challenge is cheering up customers enough that they don’t leave with frowns on their faces.
If you find yourself struggling with today’s challenge, have a look at our Video Walkthrough below.
Challenge 30
Challenge: Complete each minigame with 3 stars!
It’s a minigame extravaganza today. Every minigame you play requires you to complete it with 3 stars. That means you’ll need to be both quick and accurate. Remember that only table customers with pets can trigger minigames, and minigames are triggered when customers ask for the chip reader, blood pressure gauge, or dental tool. For more information on how to play each minigame, refer to the Minigames section of our walkthrough.
Congratulations! You’ve completed all the challenges!
Mouse Locations
You’ll encounter many animals on your veterinary adventures, but more than any other, you’ll encounter mice! There are 60 mice hidden throughout the game’s 60 story levels. The following list outlines mice locations per each chapter and location.
Chapter 1 – Arthur’s Clinic
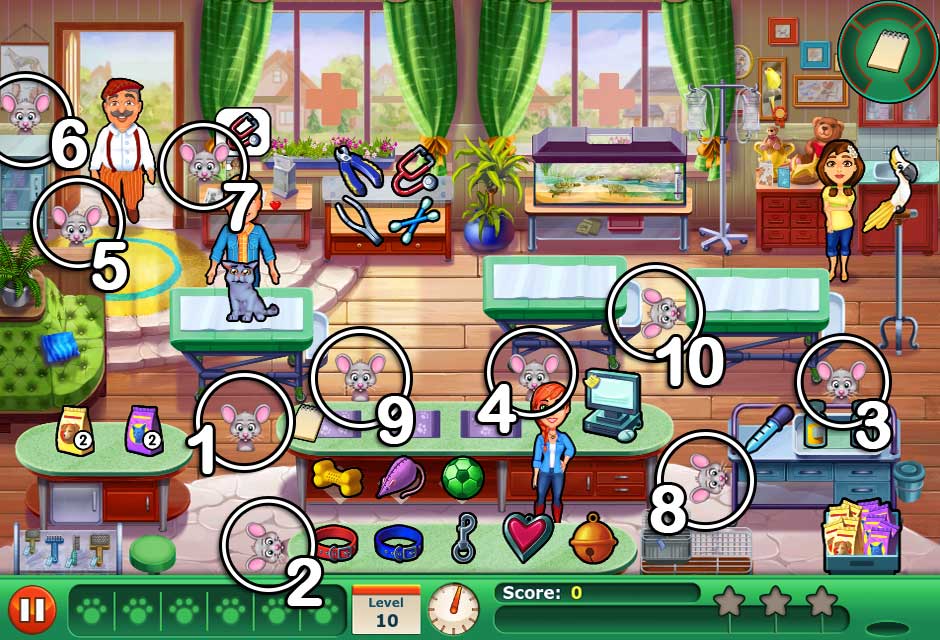
Dr. Cares – Pet Rescue 911 – Chapter 1 Mice Locations
Level 1: To the left of the main counter, below the leftmost grooming table.
Level 2: On the left side of the bottommost counter.
Level 3: On the right, behind the tray with the vaccine vials.
Level 4: Behind the counter to the left of the checkout monitor.
Level 5: Behind the divider of the waiting couch on the upper left, in front of the door.
Level 6: Behind the top of the refrigerator unit to the left of the door.
Level 7: Behind the upper left corner of the cabinet to the right of the door, in front of the curtain.
Level 8: On the left side of the vaccine cart, on the right side of the clinic.
Level 9: Behind the main counter, between the first and second placemats.
Level 10: On the left side of the rightmost examination table.
Chapter 2 – Pawsitive Clinic
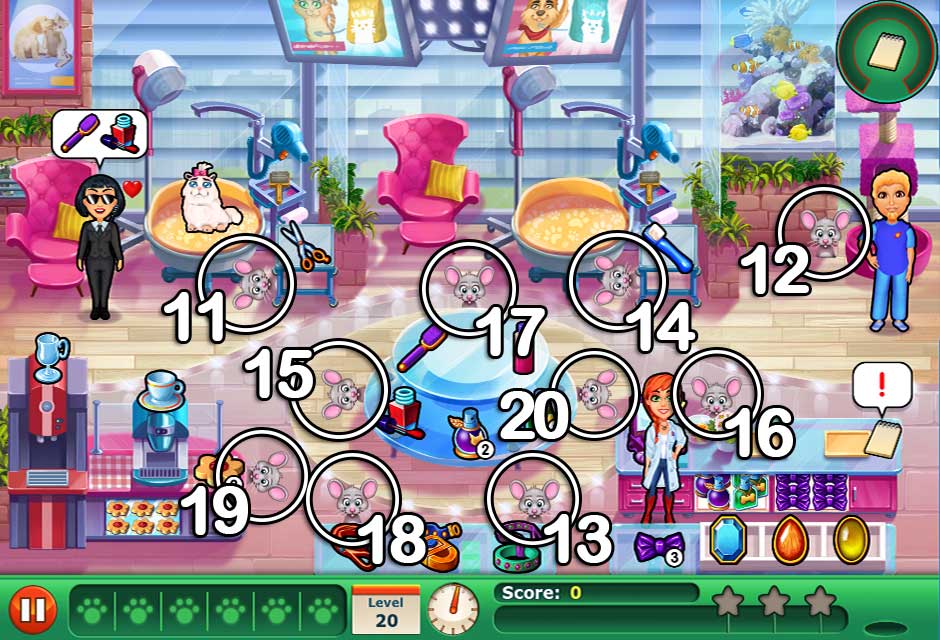
Dr. Cares – Pet Rescue 911 – Chapter 2 Mice Locations
Level 11: On the left side of the table with the scissors, next to the leftmost grooming station.
Level 12: To the left of the pet bed in the upper right corner, near the cat tree.
Level 13: Behind the upper right corner of the bottom cabinet, where the leashes are kept.
Level 14: On the left side of the table with the toothbrush, next to the rightmost grooming station.
Level 15: On the left side of the round center display table.
Level 16: Behind the checkout countertop, to the right of the checkout monitor.
Level 17: Behind the top of the round center display table.
Level 18: At the top of the bottommost display counter where the leashes are kept, toward the left side.
Level 19: On the left side of the drink counter, next to the cookie.
Level 20: On the right side of the round center display table, near the cash register.
Chapter 3 – Critical Care
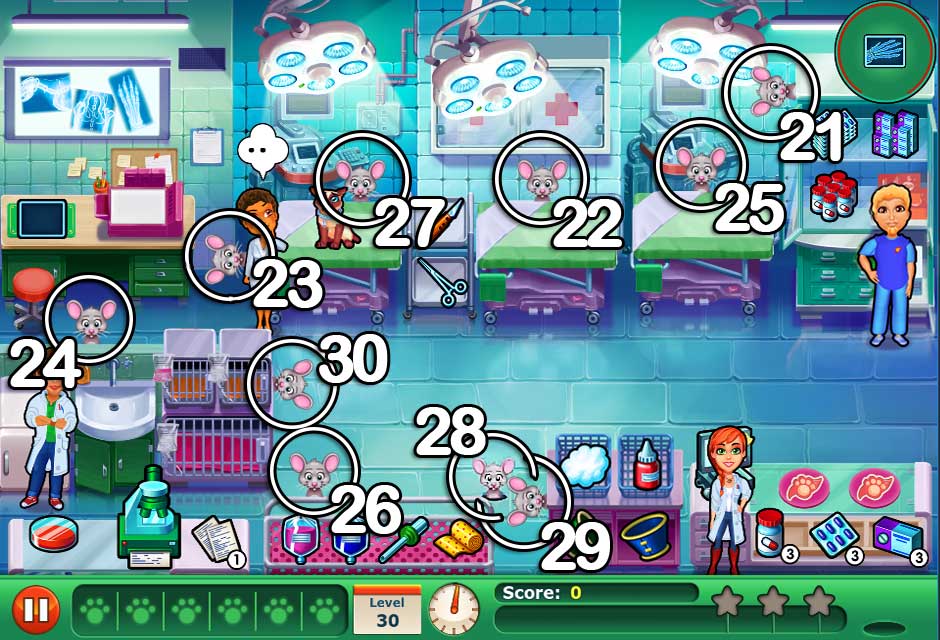
Dr. Cares – Pet Rescue 911 – Chapter 3 Mice Locations
Level 21: Behind the upper left corner of the medicine cabinet in the upper right corner of the room.
Level 22: Behind the gurney in the center of the room, below the first aid cabinets on the wall.
Level 23: On the left side of the leftmost operating table.
Level 24: Behind the wall divider above the sink on the left.
Level 25: Behind the top of the rightmost gurney, next to the medicine cabinet.
Level 26: On the top left side of the stand containing the I.V. bags and supplies at the bottom of the ward.
Level 27: Behind the top of the leftmost operating table, near the scalpel.
Level 28: On the floor, at the upper right corner of the I.V. and bandage cart.
Level 29: On the left side of the table containing the spool and surgical sewing supplies.
Level 30: On the right side of the animal cages, next to the travel carrier.
Chapter 4 – Animal Shelter
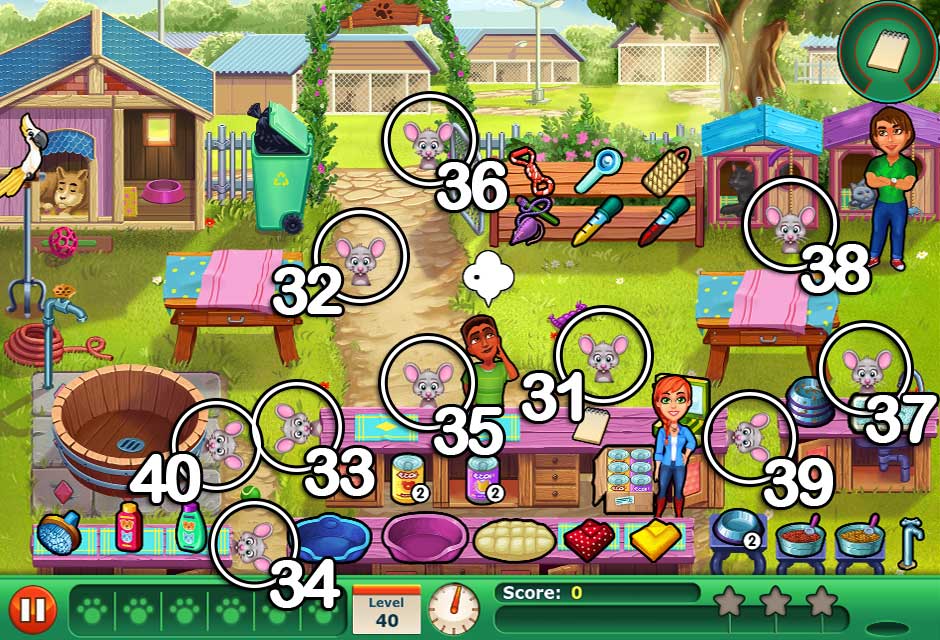
Dr. Cares – Pet Rescue 911 – Chapter 4 Mice Locations
Level 31: On the ground to the immediate upper left of the checkout monitor.
Level 32: On the left side of the dirt path, below the entrance gate.
Level 33: On the left side of the checkout counter.
Level 34: On the right side of the bottom left counter containing the shampoos and cleaning supplies.
Level 35: Behind the top of the checkout counter, between the cloth mats.
Level 36: On the ground on the right side of the entrance gate.
Level 37: Behind the sink on the right side of the screen.
Level 38: In front of the kennel with the blue roof on the upper right.
Level 39: On the right side of the checkout counter, next to the checkout monitor.
Level 40: On the right side of the wooden bath near the lower left corner.
Chapter 5 – Horse Stables
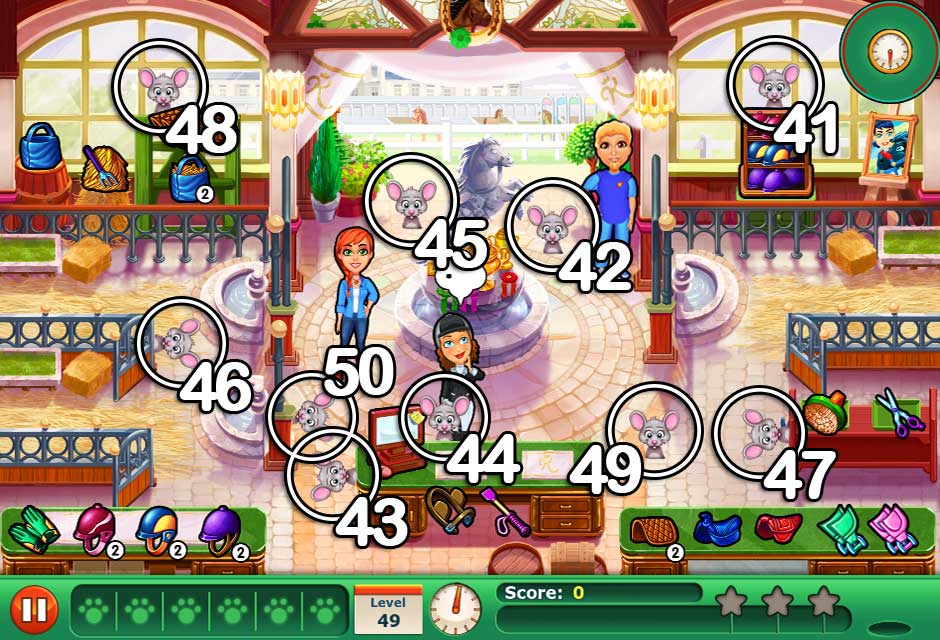
Dr. Cares – Pet Rescue 911 – Chapter 5 Mice Locations
Level 41: In the center of the window on the upper right.
Level 42: On the floor below the entrance, near the cleaner.
Level 43: On the left side of the checkout counter, next to the checkout monitor.
Level 44: Behind the top of the checkout counter, to the immediate right of the checkout monitor.
Level 45: On the floor below the entrance, on the left between the statue and the topiaries.
Level 46: On the right side of the center stable divider on the left.
Level 47: On the left side of the rightmost counter where the brush and scissors are kept.
Level 48: Behind the saddle blanket rack in the upper left corner.
Level 49: On the floor to the right of the checkout counter.
Level 50: On the right side of the pillar on the left, between the water fountain trough and checkout monitor.
Chapter 6 – Arthur’s Clinic
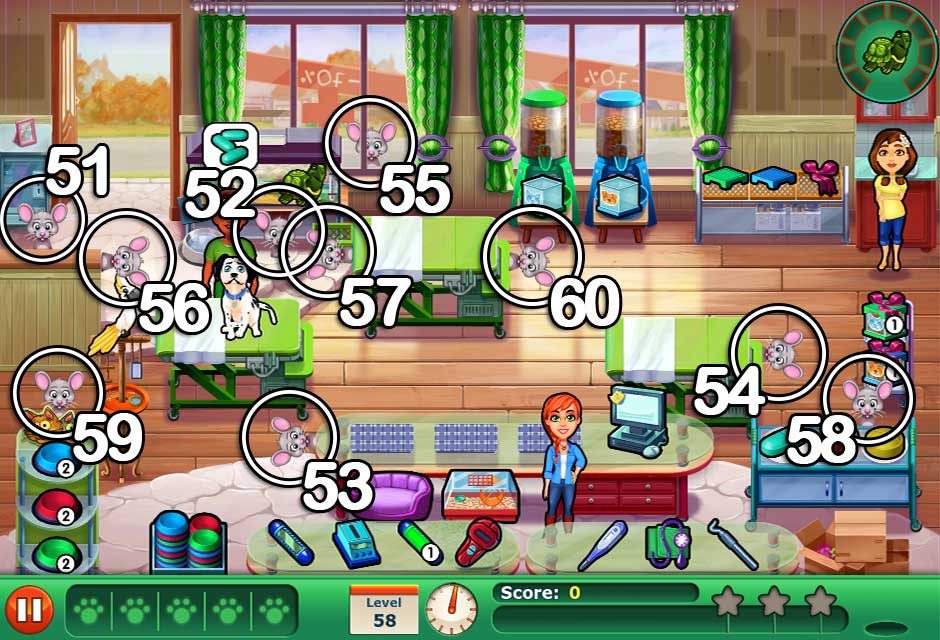
Dr. Cares – Pet Rescue 911 – Chapter 6 Mice Locations
Level 51: Behind the divider in the upper left corner, in front of the refrigerator.
Level 52: On the floor in front of the terrarium where the turtles are kept.
Level 53: On the left side of the checkout counter, near the pet bed and terrarium.
Level 54: On the right side of the rightmost grooming table, above the table with the pills.
Level 55: In the window to the immediate right of the terrarium containing the turtles.
Level 56: On the right side of the divider below the door, near the leftmost grooming table.
Level 57: On the left side of the center grooming table, below the terrarium where the turtles are kept.
Level 58: Behind the upper right corner of the counter with the pills, near the lower right side of the room.
Level 59: Behind the top of the food bowl rack on the lower left.
Level 60: On the right side of the centermost grooming table, below the food dispensaries.
Minigames
Minigames are small, quick puzzle challenges you will encounter while playing through Dr. Cares – Pet Rescue 911’s six locations. Each minigame is unique and requires you to perform a specific task quickly. This section lists every minigame you will encounter, sorted per location, and how to play.
Arthur’s Clinic
- Clean the pet’s ears! – Occurs when a customer asks for Q-tips. Click and hold, moving your cursor over the wax within the pet’s ear until it’s clean.
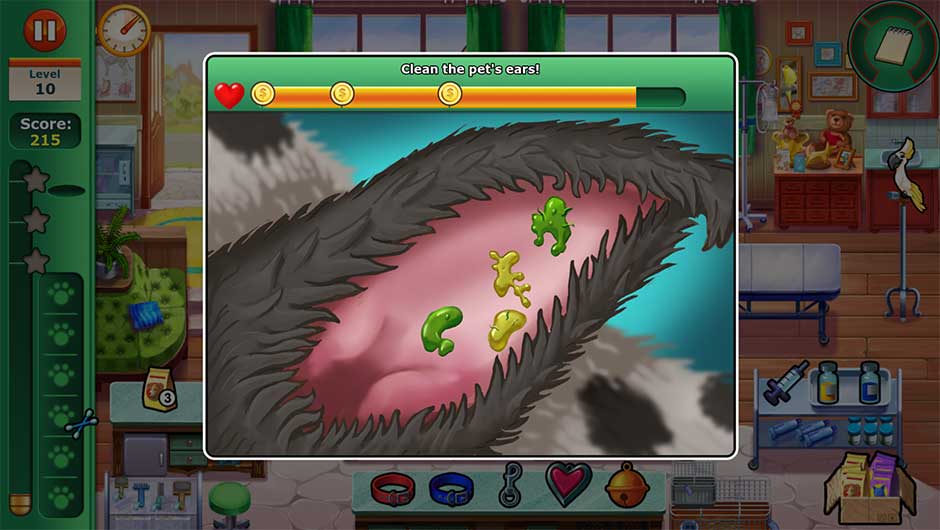
Minigame – Clean the pet’s ears!
- Remove thorns and glass from paws! – Occurs when a customer asks for tweezers. Click on the object stuck in the pet’s paw. Hold the click as you pull the item out and away from the pet’s paw. The item has been successfully removed once it disappears.
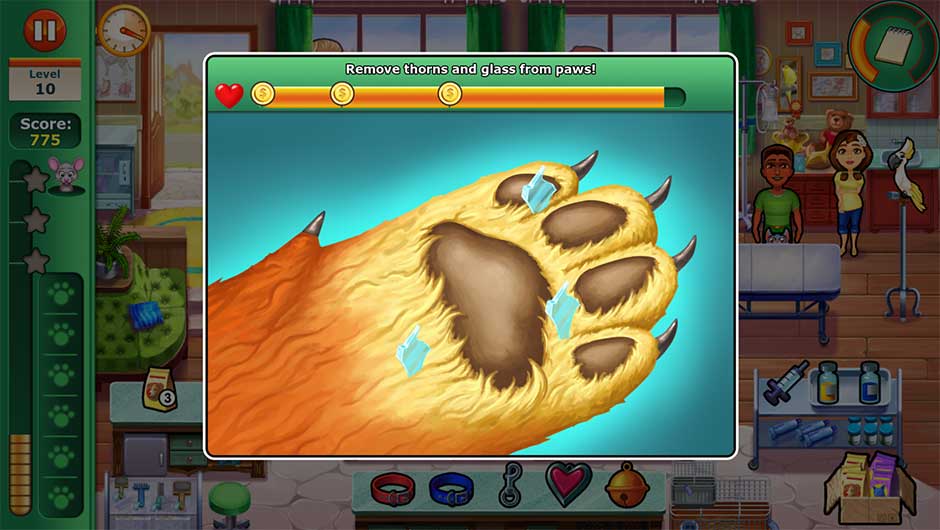
Minigame – Remove thorns and glass from paws!
- Trim the pet’s nails! – Occurs when a customer asks for nail clippers. Click on the sharp claws to trim them. You will succeed once all the claws are trimmed. Some claws may already be trimmed when the minigame starts.
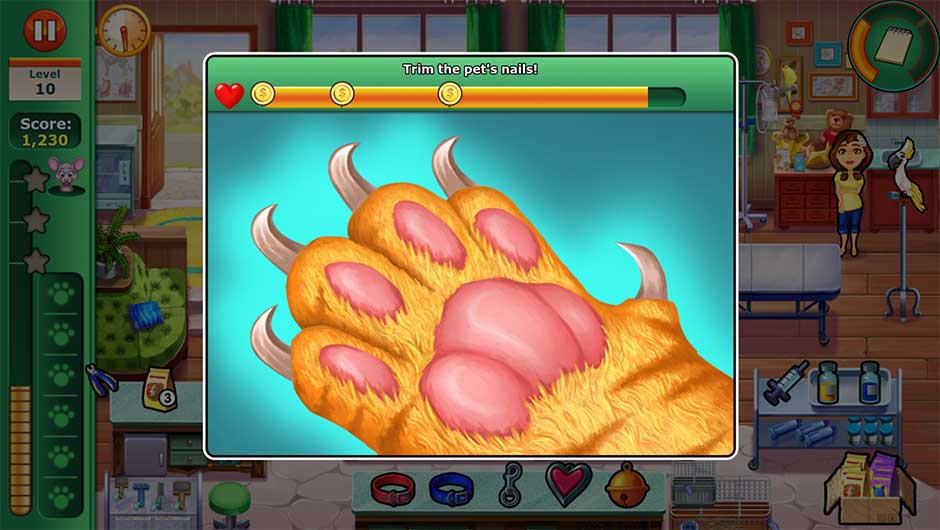
Minigame – Trim the pet’s nails!
Pawsitive Clinic
- Brush the pet’s fur! – Occurs when a customer asks for a brush. Click and hold the green arrows, moving them down in the direction they point. Move them quickly along the full length of the outline shown. Do this for all arrows shown to complete the minigame.
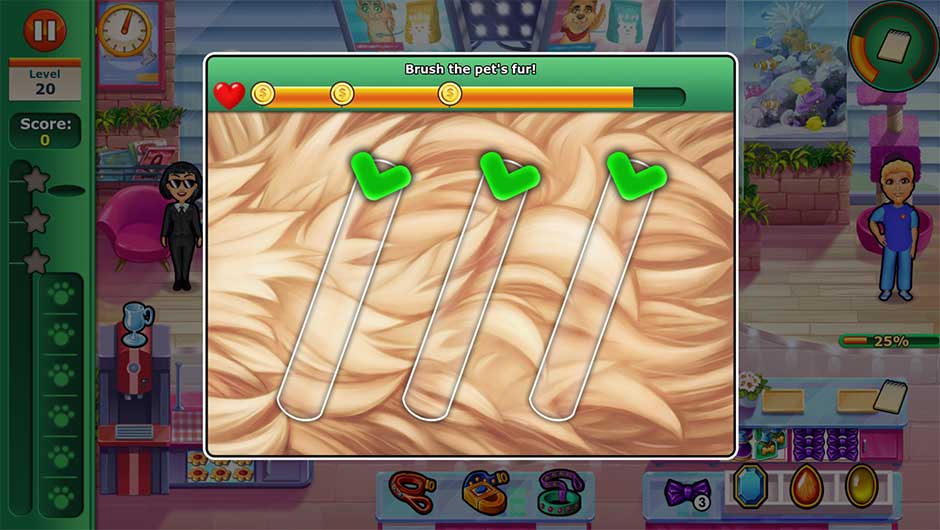
Minigame – Brush the pet’s fur!
- Cut the pet’s hair! – Occurs when a customer asks for scissors. Click on the areas indicated by a dotted circle to cut away the excess hair. Trim all the areas shown to complete the minigame.
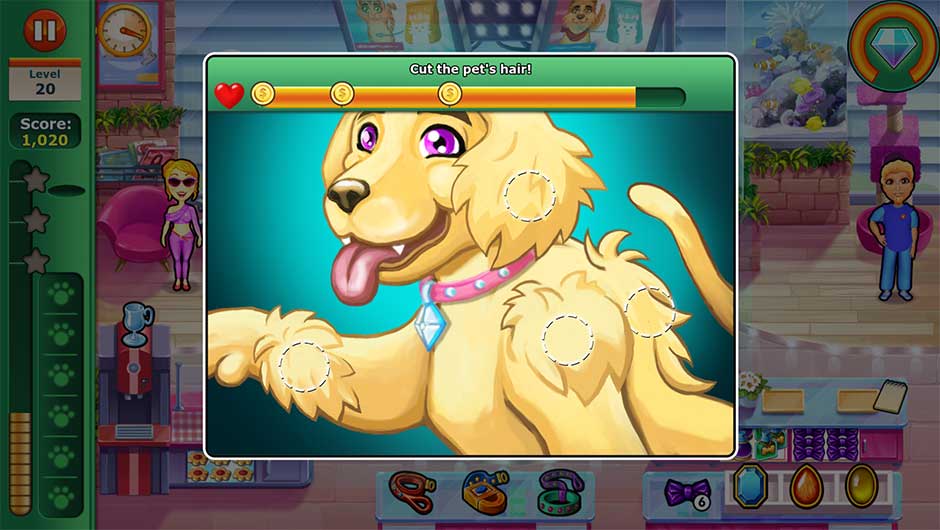
Minigame – Cut the pet’s hair!
- Clean the pet’s teeth! – Occurs when a customer asks for a toothbrush. Click on a dirty tooth, holding the click. While holding down the click, move your cursor up and down quickly, as if brushing your teeth. Do this until the dirty tooth is cleaned. Repeat for any other dirty teeth the pet may have.
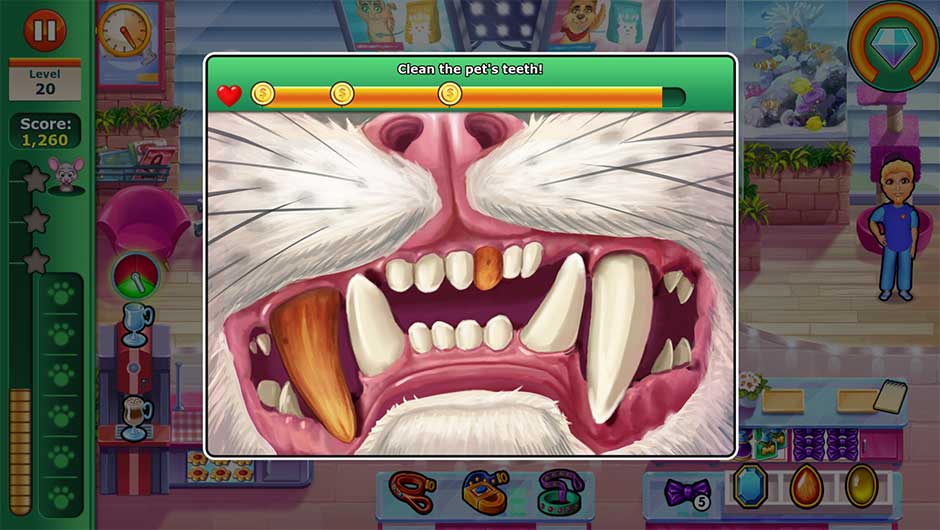
Minigame – Clean the pet’s teeth!
Critical Care
- Set the I.V. drip rate! – Occurs when a doctor asks for an I.V. bag of any kind. Click on the green button. This will cause the purple ball on the right to rise in the tube. Click on the green button so that the purple ball hovers in the green zone within the tube.
Tip! Click the green button twice very quickly as soon as the minigame opens. This will almost always immediately put the ball in the correct position.
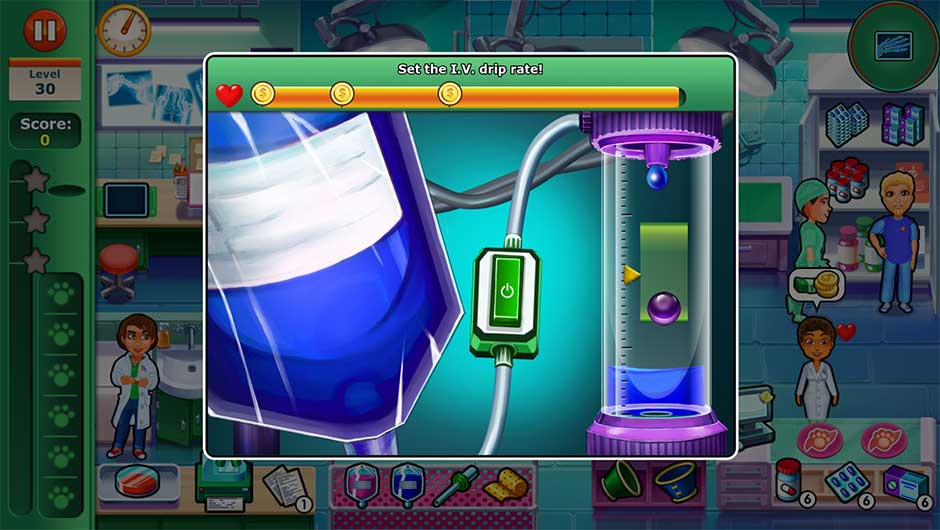
Minigame – Set the I.V. drip rate!
- Fix the broken bones! – Occurs when a doctor asks for an x-ray. Click on a bone fragment, holding the click. While holding the click, move the bone fragment into the correct location on the pet’s paw. Bone fragments will always be placed on the portions of the x-ray marked in red.
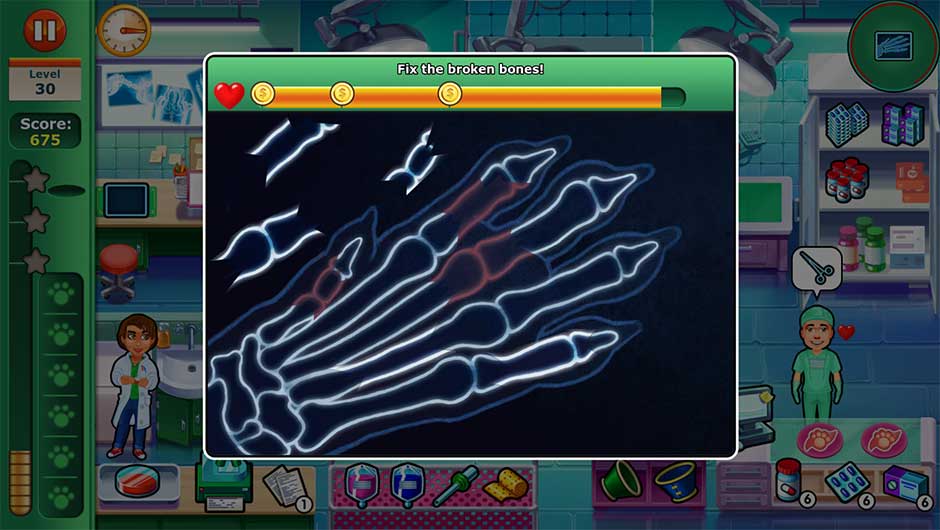
Minigame – Fix the broken bones!
- Disinfect the wounds! – Occurs when a doctor asks for a cotton swab and ointment. Click on the reddened skin areas, to cover them with cream. Repeat for all remaining spots to successfully disinfect the wounds.
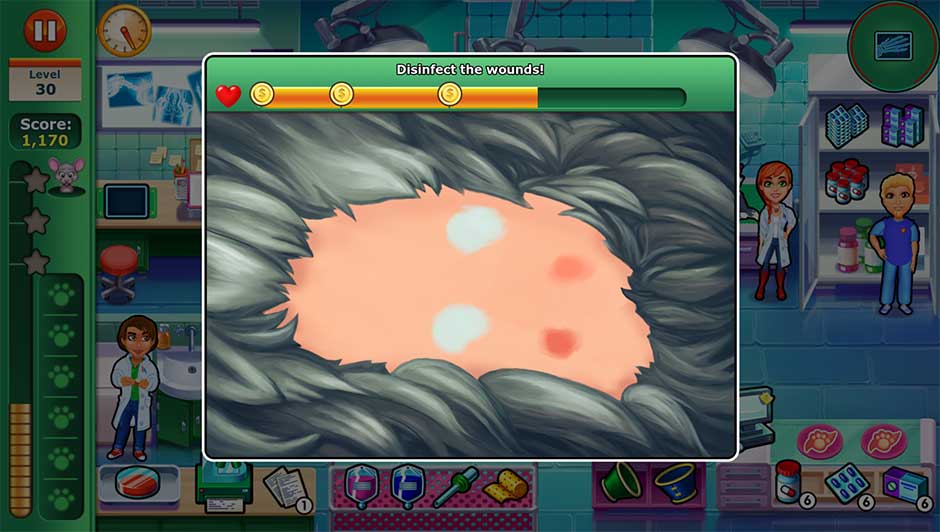
Minigame – Disinfect the wounds!
Animal Shelter
- Remove all fleas! – Occurs when an owner asks for a lens. Click on the lens and hold, moving your mouse to move the lens. When you find a flea, release the click to stop moving the lens, then click on the flea you’ve spotted to remove it. The number of boxes displayed in the upper left corner of the window indicate how many fleas you will need to find.
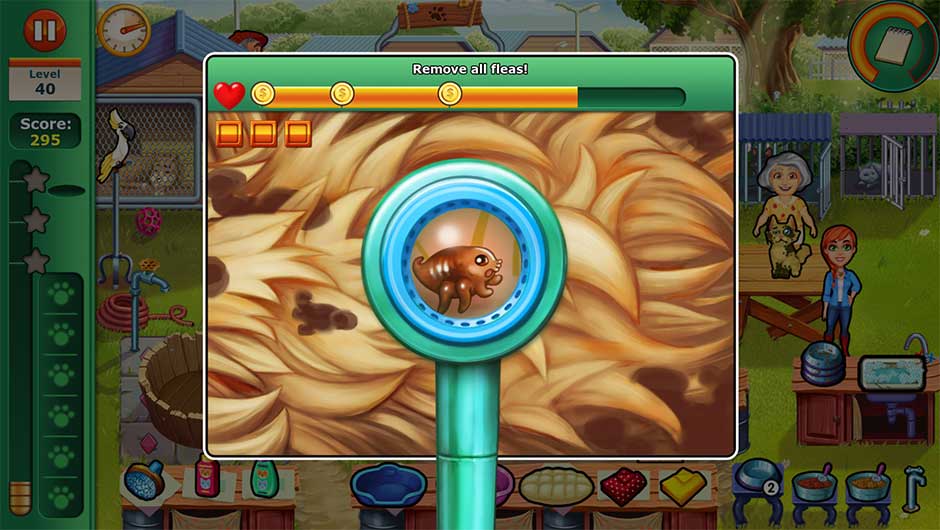
Minigame – Remove all fleas!
- Play with the dog! Make the dog happy! – Occurs when an owner asks for the rope toy. Click on the rope toy to play with the dog. Every time you click on the rope, the needle on the meter in the upper right corner will move. Land the needle in the green zone to complete the minigame and make the dog happy.
Tip! Click the rope toy twice very quickly as soon as the minigame opens. This will almost always land the needle exactly where it needs to be in the green zone.
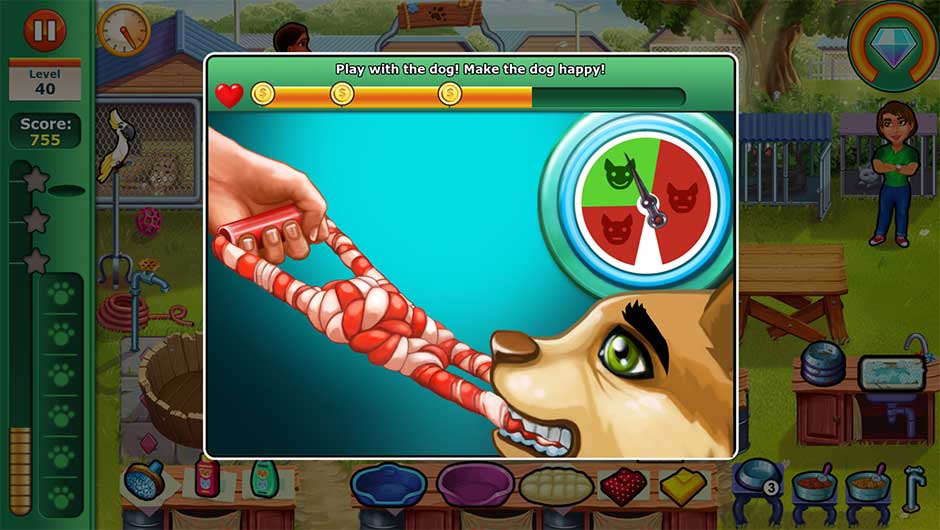
Minigame – Play with the dog!
- Play with the cat! Make the cat happy! – Occurs when an owner asks for the purple mouse and string. Click on the mouse to play with the cat. Every time you click the mouse, the needle on the meter in the upper right corner will move. Land the needle in the green zone to complete the minigame and make the cat happy.
Tip! Click the mouse toy twice very quickly as soon as the minigame opens. This will almost always land the needle exactly where it needs to be in the green zone.
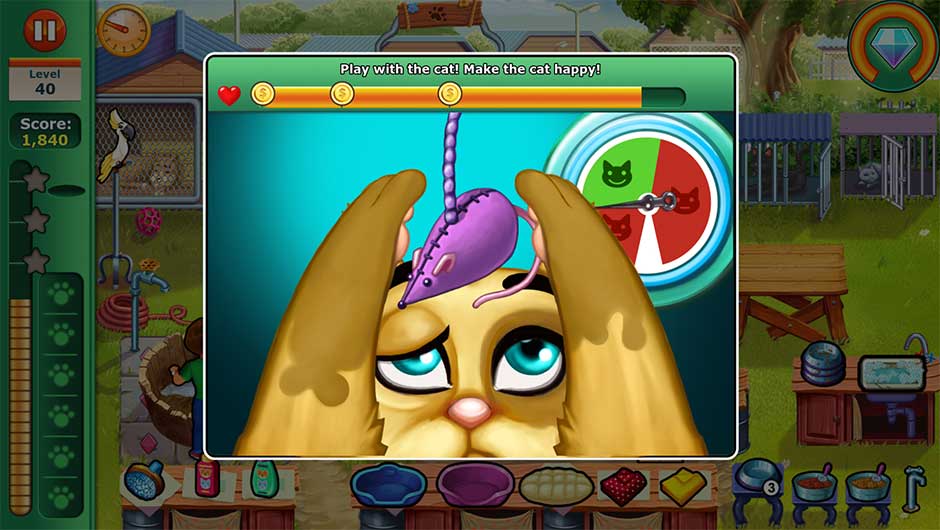
Minigame – Play with the cat!
- Bathe the pet! – Occurs when an owner asks for a brush and shampoo. Click on a dirt stain and hold the click. While holding down your click, move your cursor rapidly back and forth over the dirt to remove it from the pet. Once all the dirt is gone, you’ll have completed the minigame.
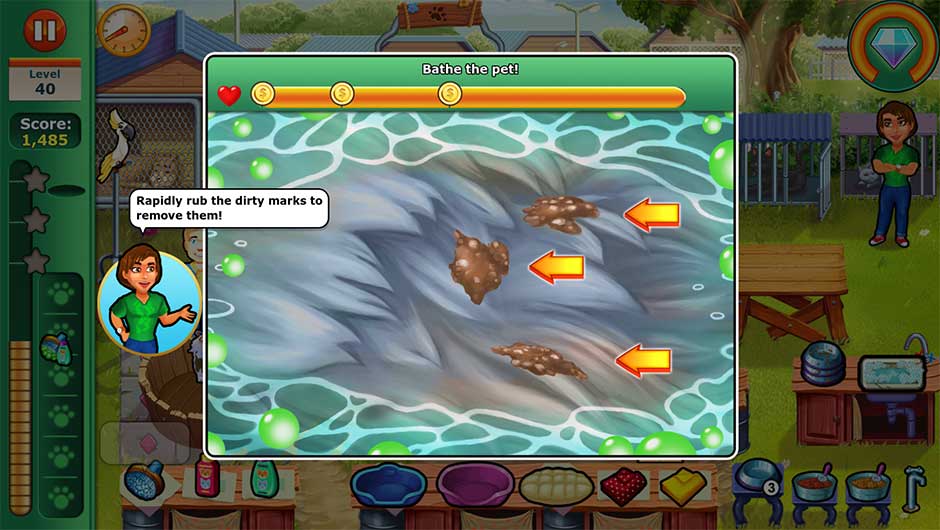
Minigame – Bathe the pet!
Horse Stables
- Fasten the harness! – Occurs when a rider asks for a saddle while their horse is in a stall. Click and hold the pointed end of a saddle strap. While holding the click, move the strap down around the horse to tighten it. You will complete the minigame once all the straps are tightened.
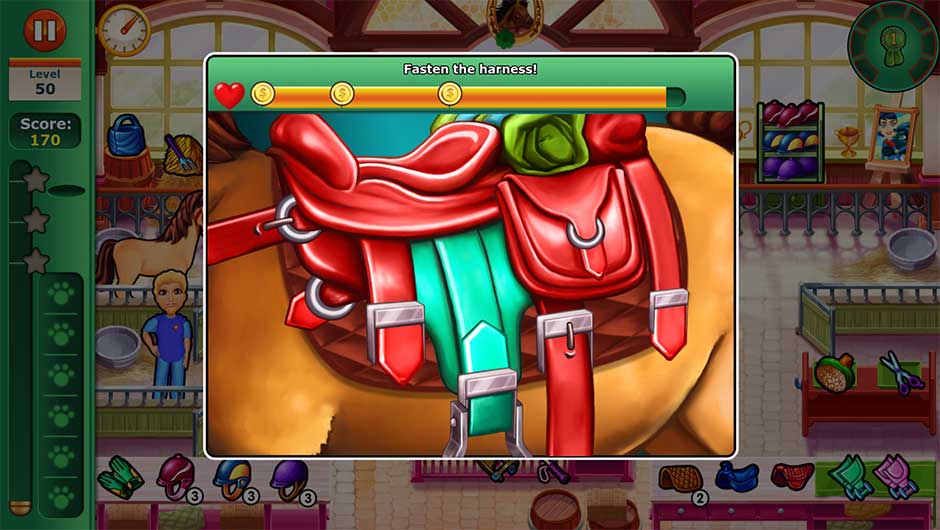
Minigame – Fasten the harness!
- Clean the hooves! – Occurs when a rider asks for a brush. Click on the dirt and hold, moving your cursor back and forth rapidly to remove the dirt. Clear all the dirt away to complete the minigame.
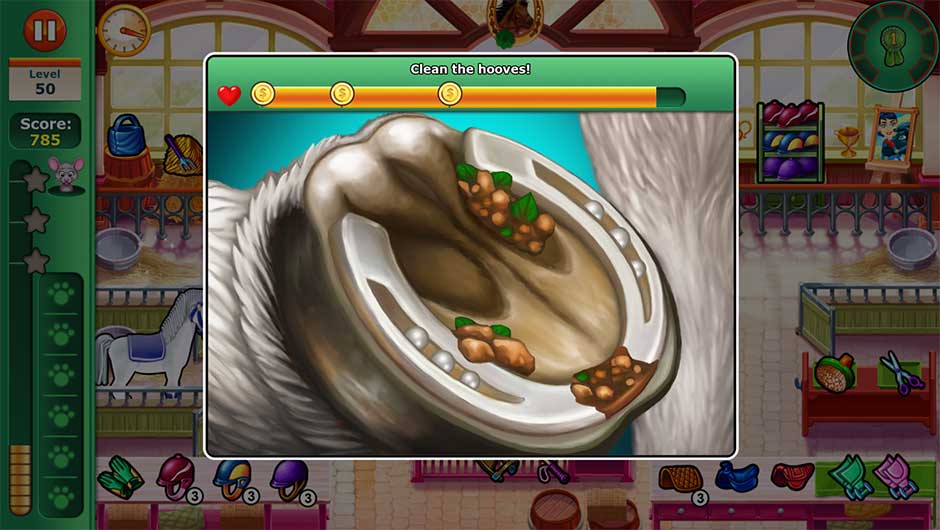
Minigame – Clean the hooves!
- Cut the horse’s hair! – Occurs when a rider asks for scissors. Click on the dotted circles to cut away the horse’s excess hair. The minigame will be finished as soon as all the extra hair has been cut away.
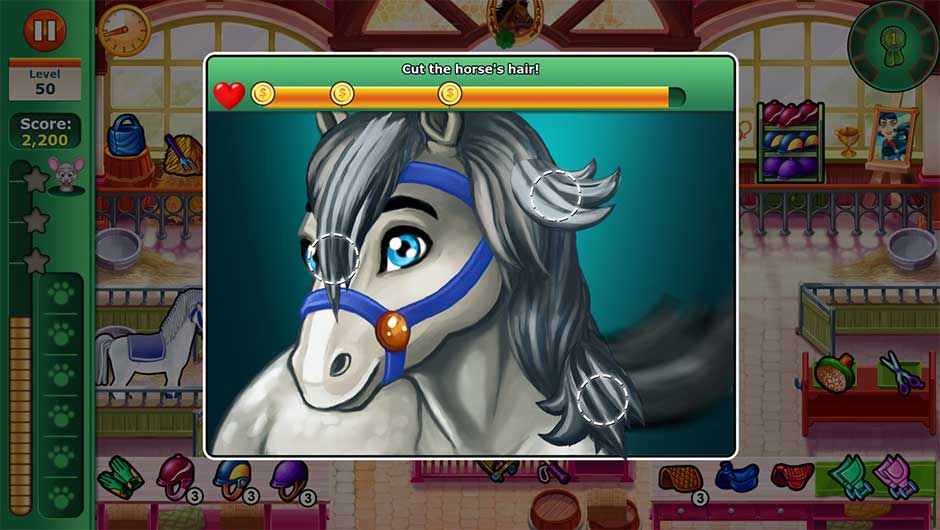
Minigame – Cut the horse’s hair!
Arthur’s Clinic (Chapter 6)
- Activate the chip! – Occurs when an owner asks for the chip device. Click on the circular dial on the device and hold. A needle will appear, moving around the circular dial. As soon as the needle lands in the green zone, release the click to activate the chip.
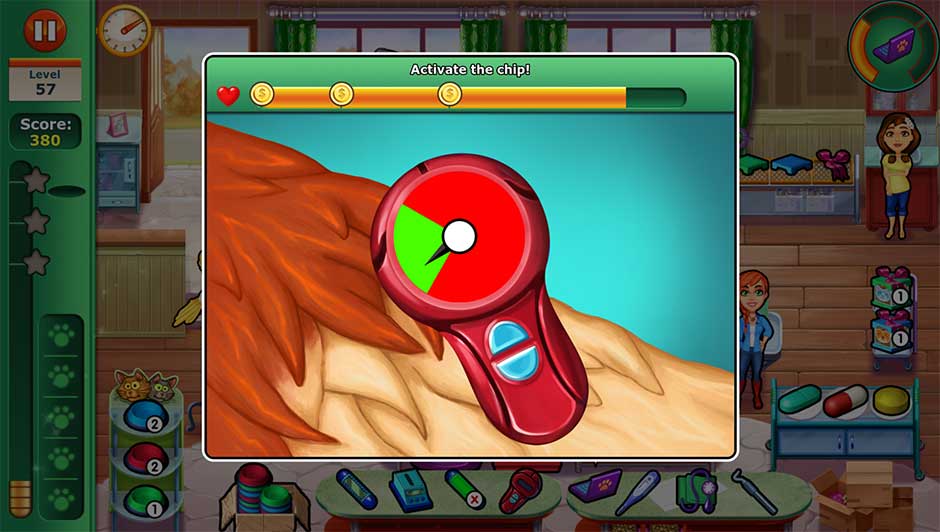
Minigame – Activate the chip!
- Clean the pet’s teeth! – Occurs when an owner asks for a dental scaler. Click on the plaque on the pet’s teeth, breaking it away. Break away all the plaque to complete the minigame.
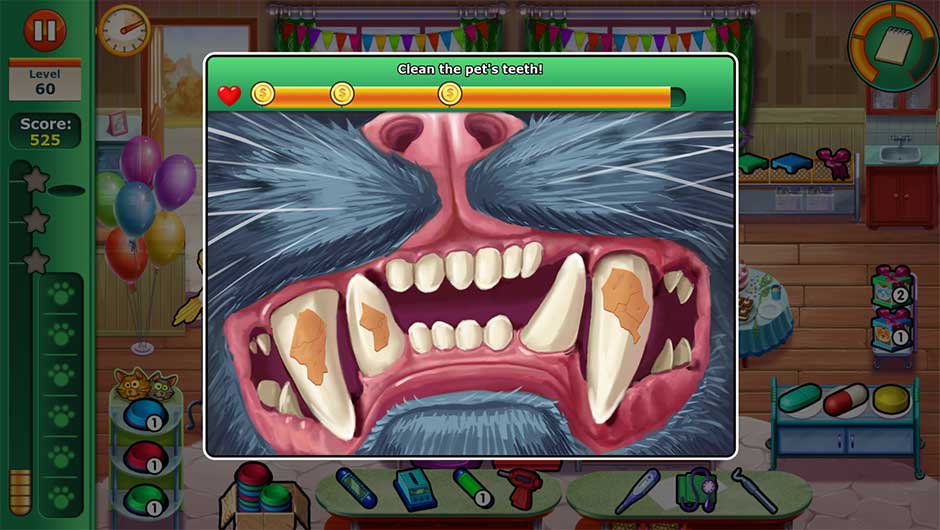
Minigame – Clean the pet’s teeth!
- Check the pet’s blood pressure! – Occurs when an owner asks for a blood pressure gauge. Click on the inflation bulb to fill the tube on the right with air. This will cause the purple ball to float. Click on the bulb to inject the tube with air until the purple ball hovers in the green zone, completing the minigame.
Tip! Click on the inflation bulb twice very quickly as soon as the minigame opens. This will almost always put the purple ball exactly where it needs to be within the green zone.
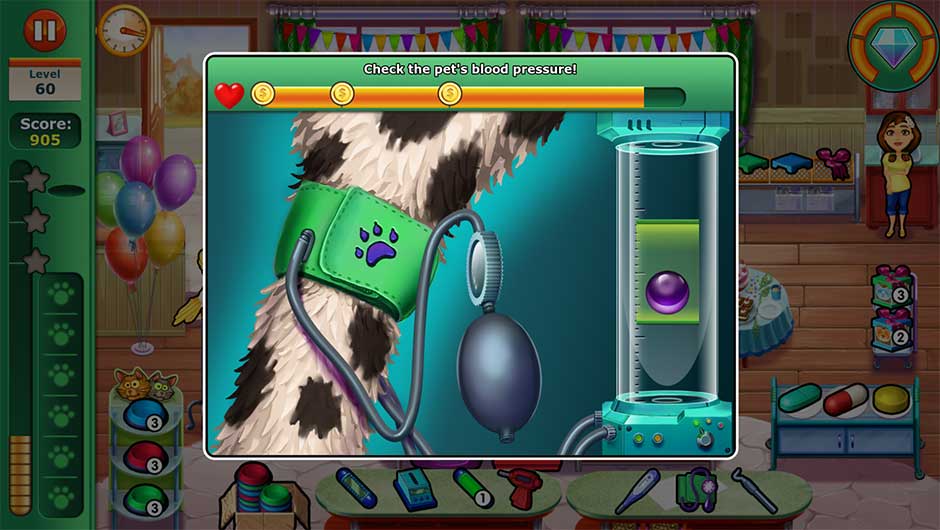
Minigame – Check the pet’s blood pressure!
Trophies
Celebrate your veterinary achievements by unlocking the 21 trophies available in Dr. Cares – Pet Rescue 911. Click on the trophy icon in the upper right corner of the level select map to view your collection of trophies. This section of the walkthrough names each trophy, its description, and how to unlock it.
| Trophy Name | Description | How to Unlock |
| Humble Beginnings | You finished your first day! | Complete Level 1: Homecoming. |
| The First One | You healed your first pet! | Help your first pet, unlocked at the start of the game during Level 1. |
| Homecoming | Complete the first chapter. | Complete Levels 1 – 10 of Arthur’s Clinic. |
| Glitter Times | Complete the second chapter. | Complete Levels 11 – 20 of the Pawsitive Clinic. |
| High Stakes | Complete the third chapter. | Complete Levels 21 – 30 of Critical Care. |
| Pets in Need | Complete the fourth chapter. | Complete Levels 31 – 40 of the Animal Shelter. |
| The Winner Takes All | Complete the fifth chapter. | Complete Levels 41 – 50 of the Horse Stables. |
| Family Business | Complete the last chapter. | Complete Levels 51 – 60 of Arthur’s Clinic. |
| Amy’s Future | Watch the epilogue. | Complete Level 60 and watch the epilogue that follows. |
| Purrfect! | Reach 25 “Purrfect” combos. | Check out 4 or more customers at the same time at the cash register. |
| Having Fun | Play with 50 pets. | Unlockable during Levels 31 – 40. Play the minigames Play with the cat! and Play with the dog! by using the dog rope and the purple mouse on a string when owners ask for them. Must be completed 50 times. |
| Hey, Beautiful! | Groom 50 pets. | Unlockable during Levels 11 – 20. Play the minigames Brush the pet’s fur! and Cut the pet’s hair! by using the brush and scissors when owners ask for them. Must be completed 50 times. |
| Good Deeds | Heal 500 animals. | Aid 500 animals over the course of your veterinary career. |
| *BWAAH* | Buy all the gifts for Newton. | Purchase all of Newton’s gifts using diamonds. Earn diamonds by completing level challenges. To view and purchase gifts, click on the Diamonds tab in the upper right corner of the level select map. |
| Party! Party! | Have Newton entertain 100 pets. | Unlockable at the chapter locations Arthur’s Clinic and Animal Shelter. Click on Newton, followed by an animal either awaiting treatment or their owner. Newton will entertain the animal and improve the customer’s mood. |
| Shopping Spree | Buy all the upgrades in the game. | Purchase all the upgrades available in the game. Upgrades can be purchased after selecting a level from the level map, and before clicking the “Play” button. Upgrades are unlocked per chapter location. |
| Master Vet | Complete each minigame, and earn the highest score. | Play all the minigames available in each chapter, and score 3 stars in each. See the Minigames section for more information on individual minigames. |
| High Score | Score a total of 500,000 points. | Applies to all levels in the game. Score a grand collective total of 500,000 points or more. |
| EEEK! | Find all the mice in the game. | Locate all 60 mice hidden in Levels 1 – 60 (excluding challenge levels). See the Mouse Locations section for more information. |
| Best of the Best | Earn all stars on all levels. | Complete every challenge level and earn 3 stars on story Levels 1 – 60. Refer to the walkthrough above for specific per-level strategies, or refer to the Video Walkthrough below. |
| Amy’s Memories | Collect all the trophies. | Unlock all 20 other trophies listed above. |
Video Walkthrough
Welcome to the video walkthrough portion of our guide! For visual learners, we’ve prepared a video walkthrough featuring a complete playthrough of Dr. Cares – Pet Rescue 911 Platinum Edition: 100%! Complete all levels with a 3-star rating and conquer every challenge with pinpoint precision. You’ll even find animal cameos with the locations of all 60 hidden mice. Click the “Play” button below to get started, or click on the options menu in the upper left corner of the video frame to select a different level.
Whether you need additional help or your game isn’t working correctly, our Customer Service team is available to help.
Click here to send a support ticket!
The Dr. Cares – Pet Rescue 911 Official Walkthrough is meant as a guide and does not contain cheats, hacks, or serials.
The post Dr. Cares – Pet Rescue 911 Official Walkthrough appeared first on GameHouse.
